Configuring a new instance
Estimated reading time: 3 minutes
Requirements
- Access to the EC2 dashboard
- Preconfigured DNS names that under your control (e.g. pbx.example.co.uk)
Configuring your new PBX
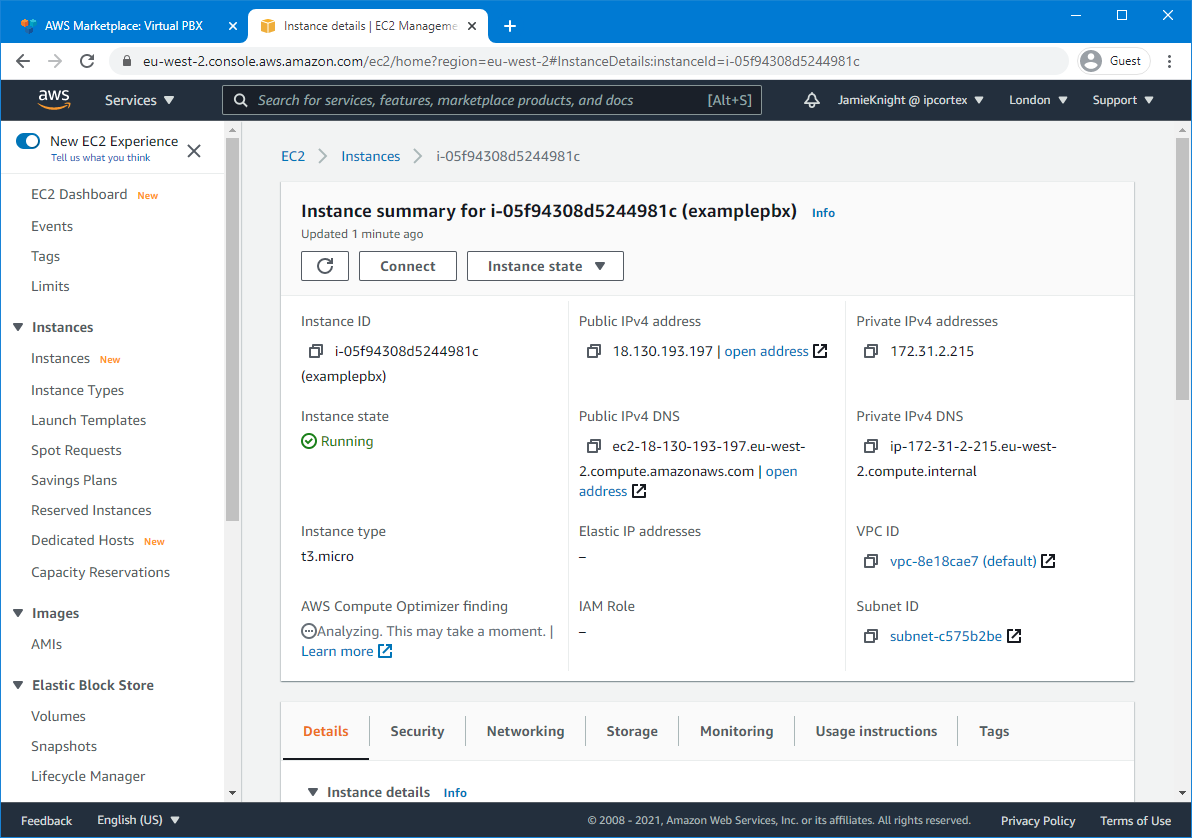
- Go to the EC2 Dashboard, open your new instance, and click the link to the public IP. (Labelled as open address.)
- As the PBX doesn’t yet have a valid certificate it will need you make a security exception in the browser. Once you’ve done this you will be presented with a PBX login page. The default username/password is
adminand the instance ID. (Which is in the format ofi-xxxxxxxxxxxxxxxxx.)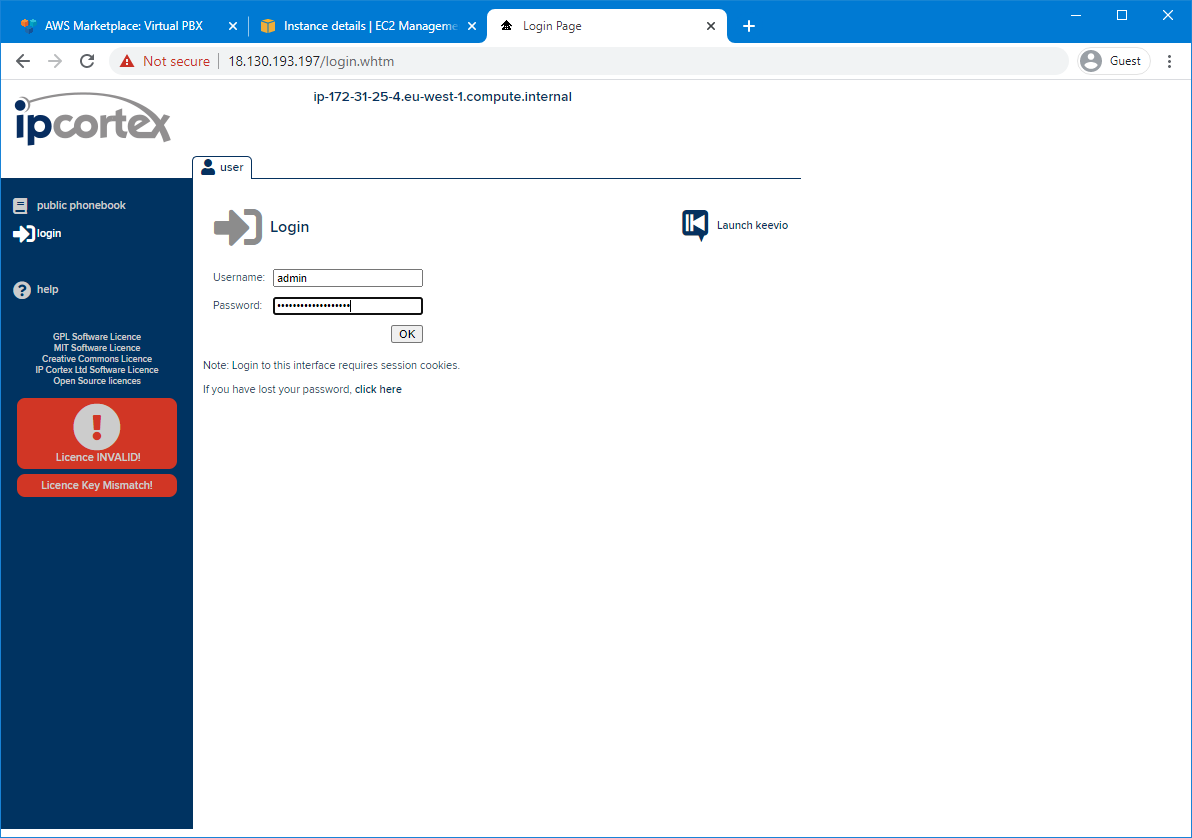
- You will be presented with the initial configuration wizard. The first part of this to activate the unit. There are two ways to do this:
- If you have previously contacted us and received an activation key, you can enter it here.
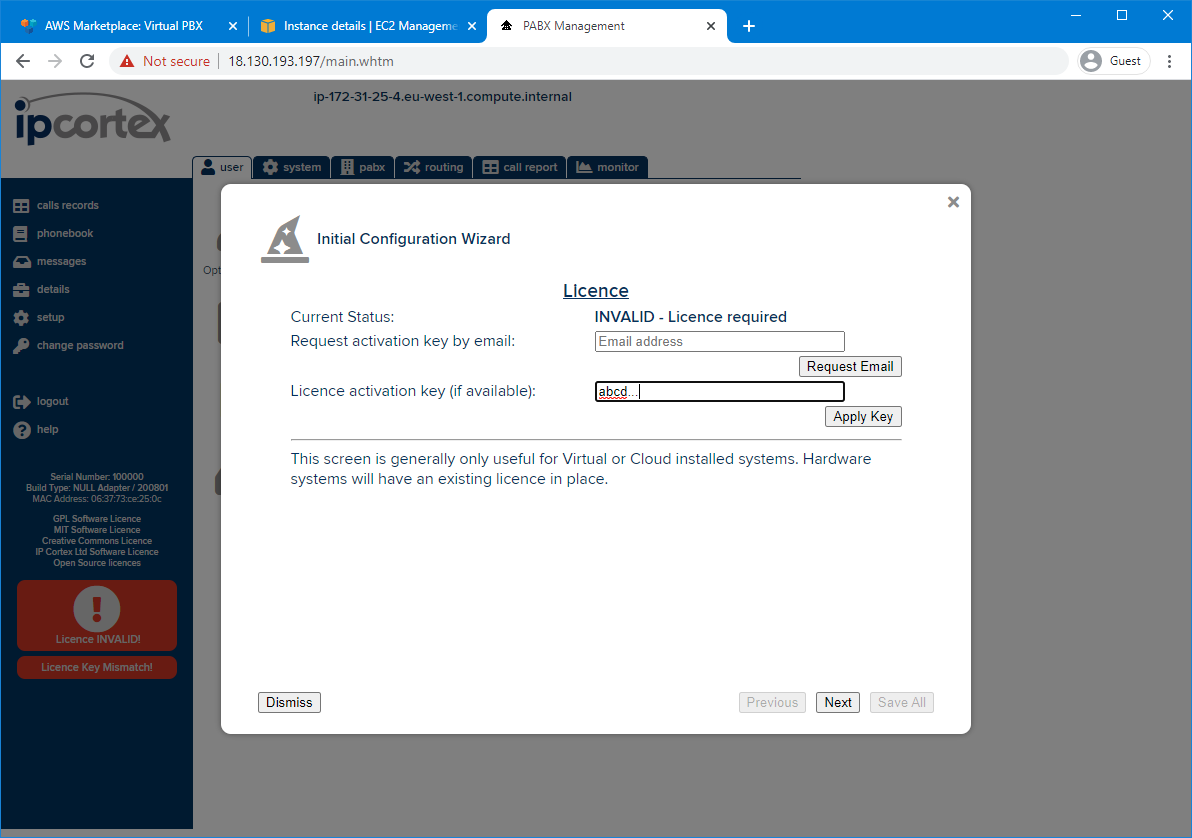
- Otherwise, you can automatically issue an activation licence by entering your email address. This will give you a 60-day evaluation licence. We will then contact you to extend the licence into a permanent one.
- If you have previously contacted us and received an activation key, you can enter it here.
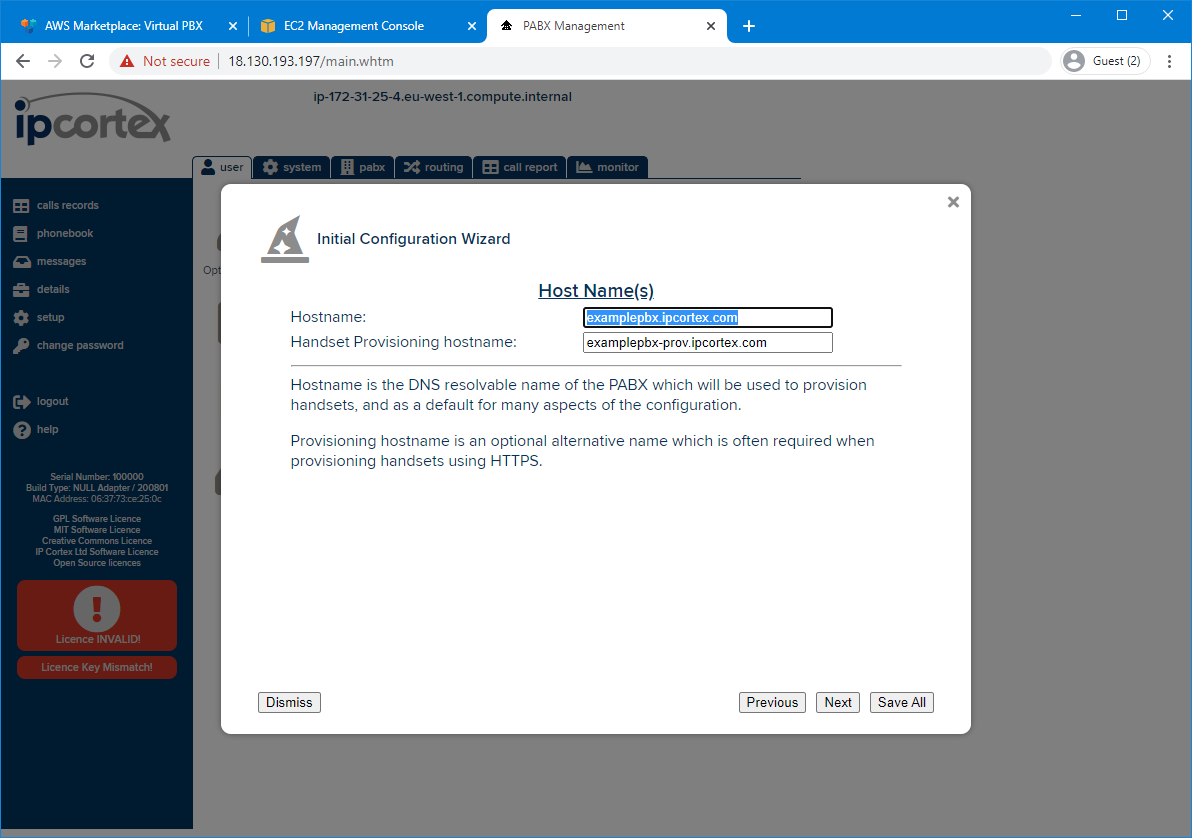
- On the next page, enter a system and provisioning hostnames. Both will be required to use handsets on the system, and need to resolve to the public IP address on the instance.
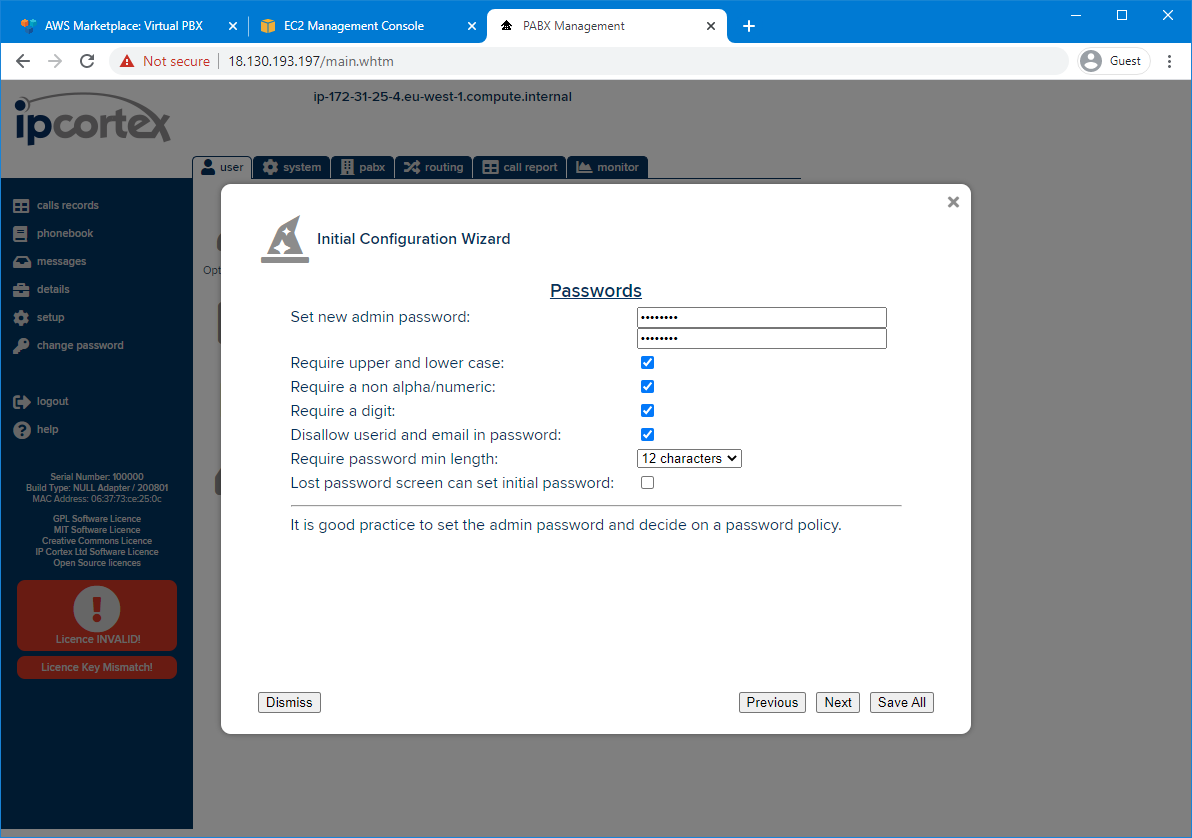
- You will now be asked to set a new admin password and the password policy. You should set the admin password to a strong one unique to your other accounts, preferably using a password generator. You can also set a password policy for all future user accounts.
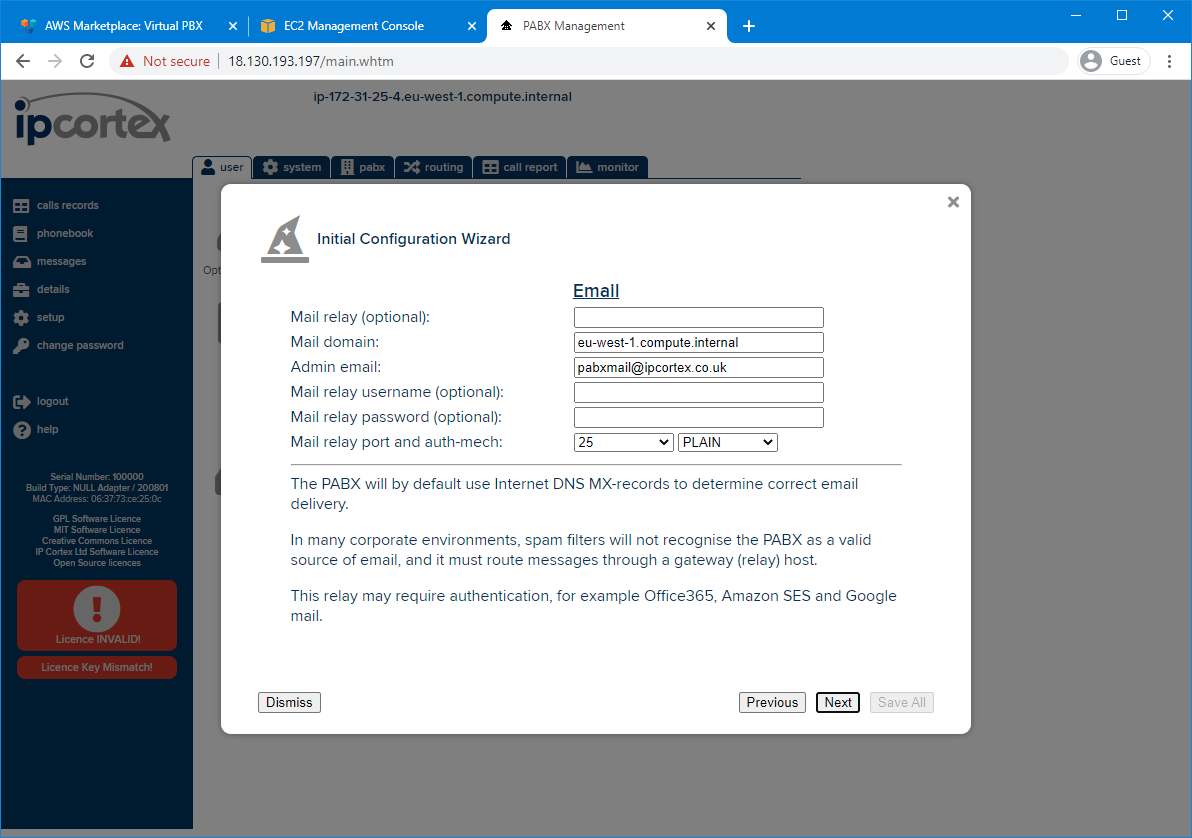
- The next step is to configure email. At a minimum you will need to set the Mail domain and Admin email. You can use any outbound SMTP you like, including AWS’s own Simple Email Service, or none at all.
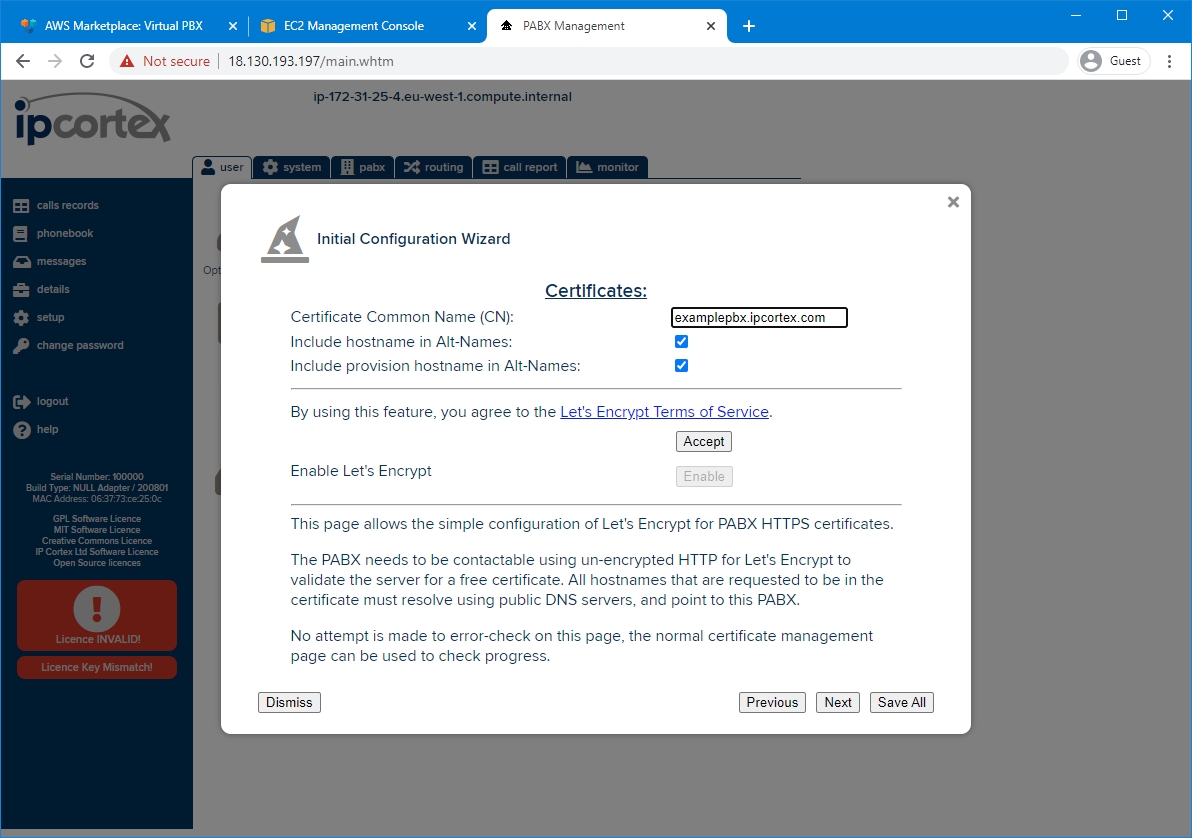
- (Optional but recommend) You will then be asked to configure the certificates. We recommend using the free Let’s Encrypt service. To do this enter the system hostname in the Certificate Common Name field, and tick Include provision hostname in Alt-Names. Read the linked terms of service and click Accept then Enable. (If you have a custom certificate, skip this step and configuring it manually from the certificates page.)
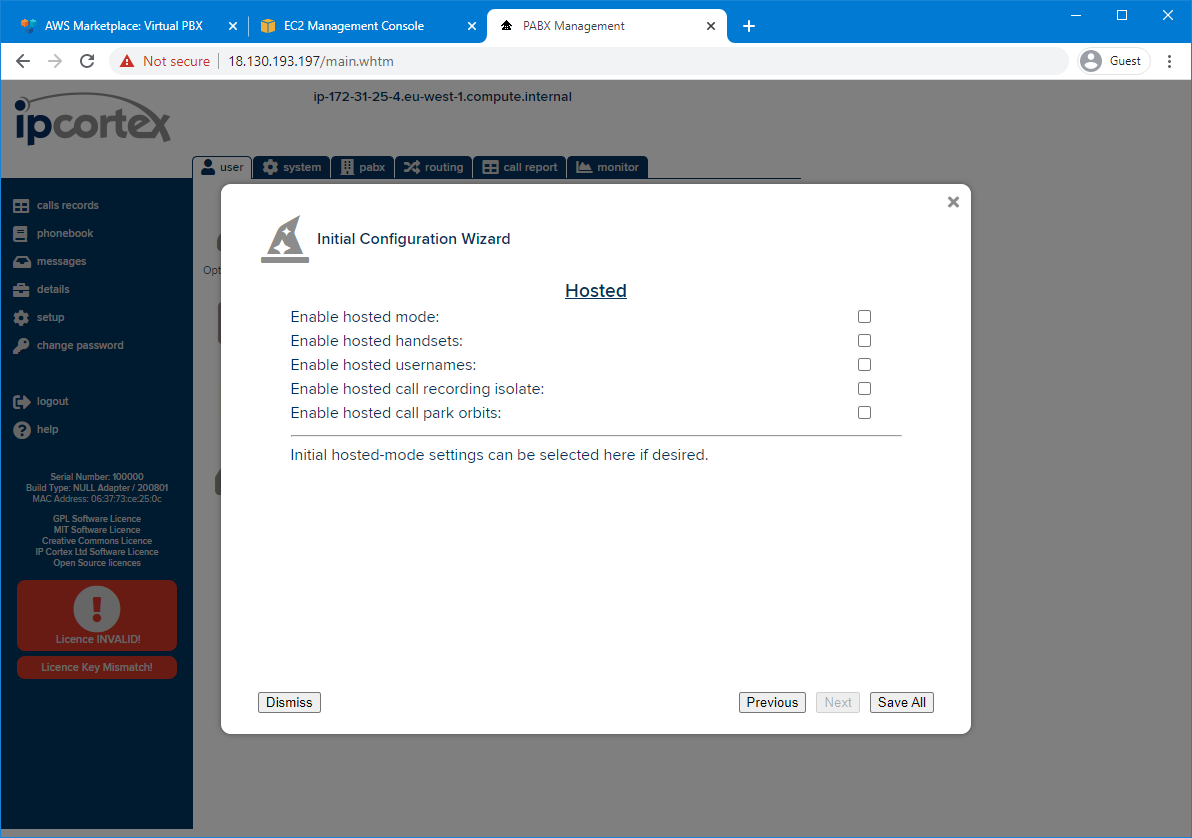
- (Optional) You then have the option of enabling Hosted mode. These provide a number of useful changes to SPP partners such as:
- Putting all handsets into hosted mode
- Defaulting handset monitoring to on
- Defaulting extension creation to private
- Hiding the public phonebook
- Enforcing phonebook isolation between companies (multi-company systems only)
- Removing TAPI information (which relies on the insecure AMI feed)
- Once you have completed the above steps, click Save All and the settings will be applied. Reboot the system for all the changes to take effect.