Launching a PBX on AWS
Estimated reading time: 4 minutes
First-time steps
The first time you use our image on an AWS account, you will need to subscribe to it in the AWS marketplace.
Note: subscribing to the instance is free - you only pay for the EC2 instances you create and the PBX licences you activate.
- Login to your AWS account dashboard.
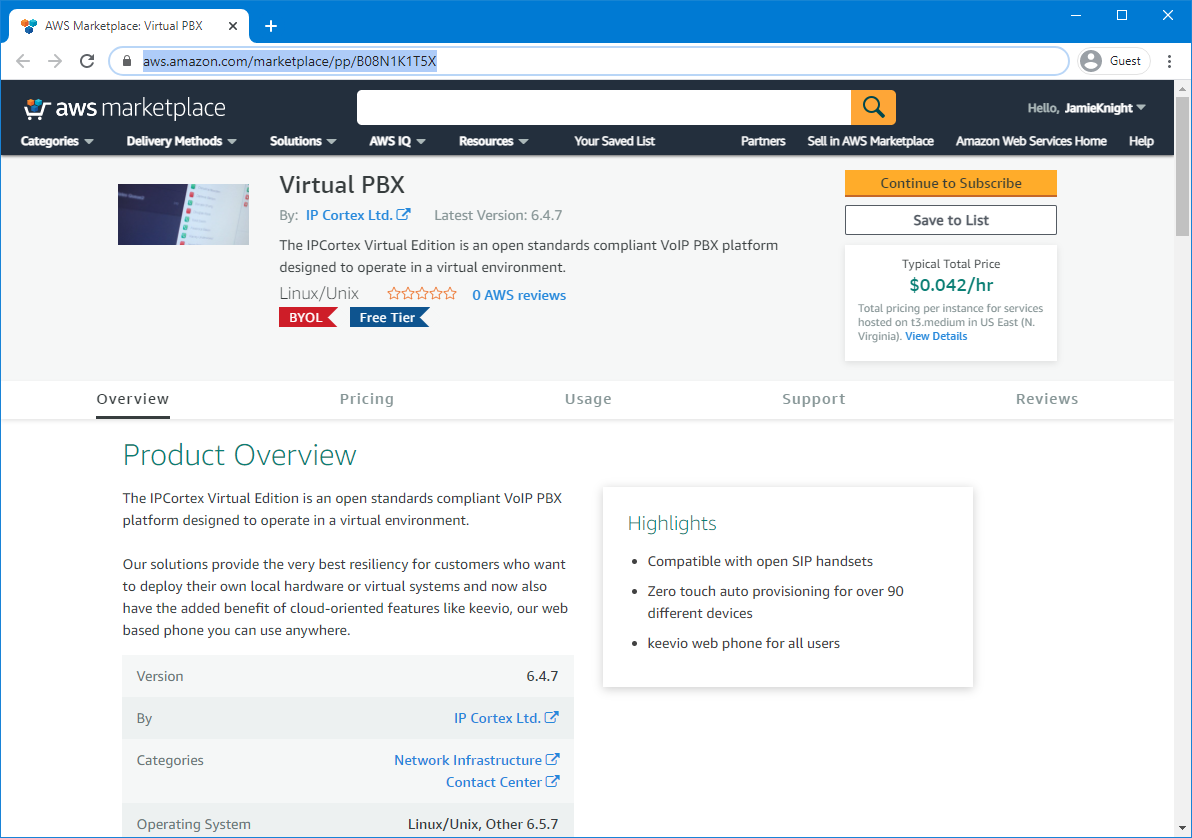
- Go to https://aws.amazon.com/marketplace/pp/B08N1K1T5X, click Continue to Subscribe, then read and agree to terms, and then wait for the agreement to be processed.
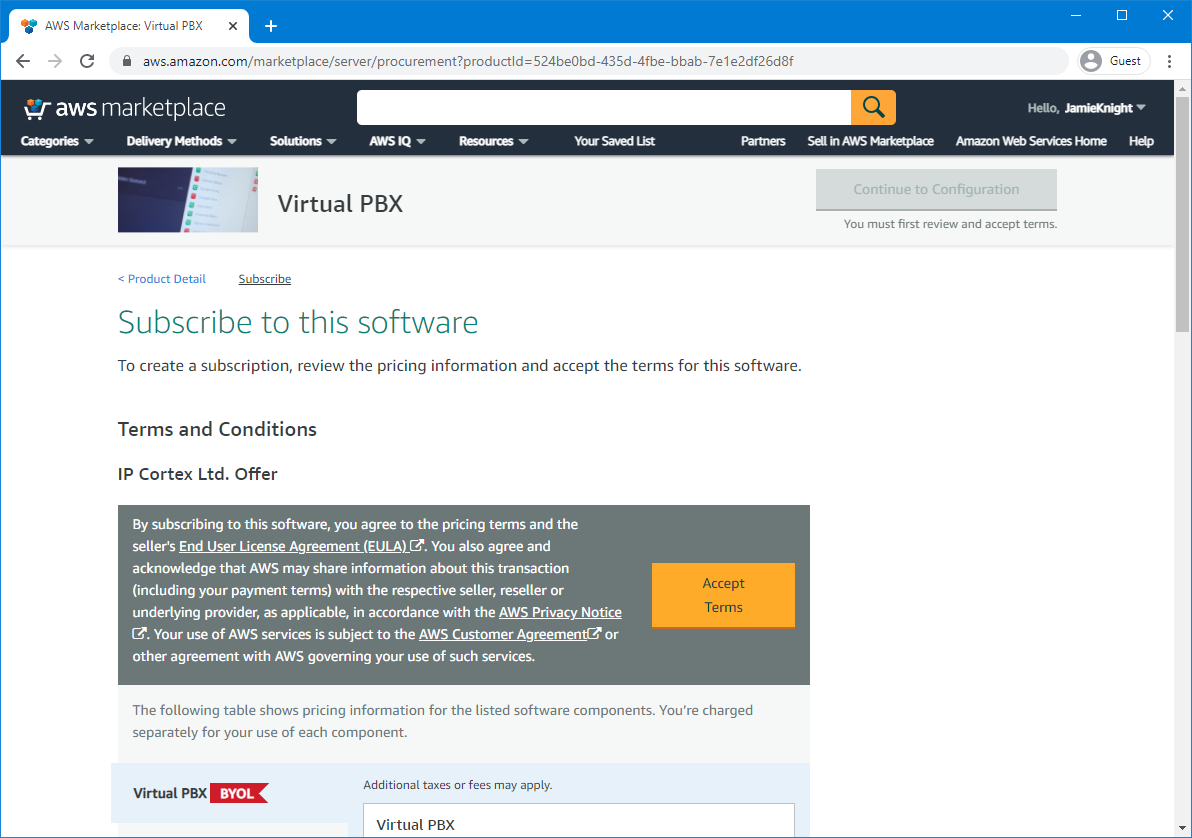
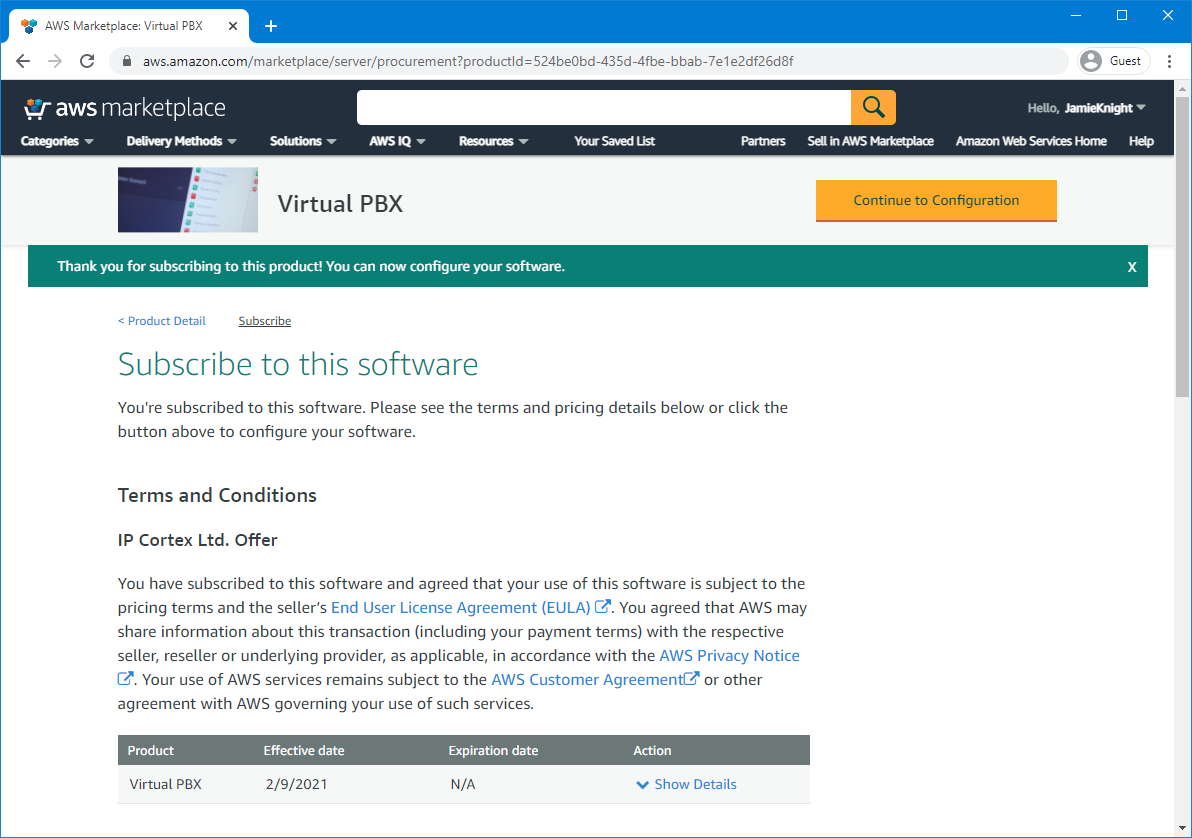
- Once the agreement has been processed and the button is available, click “Continue to Configuration”.
Launching a new instance
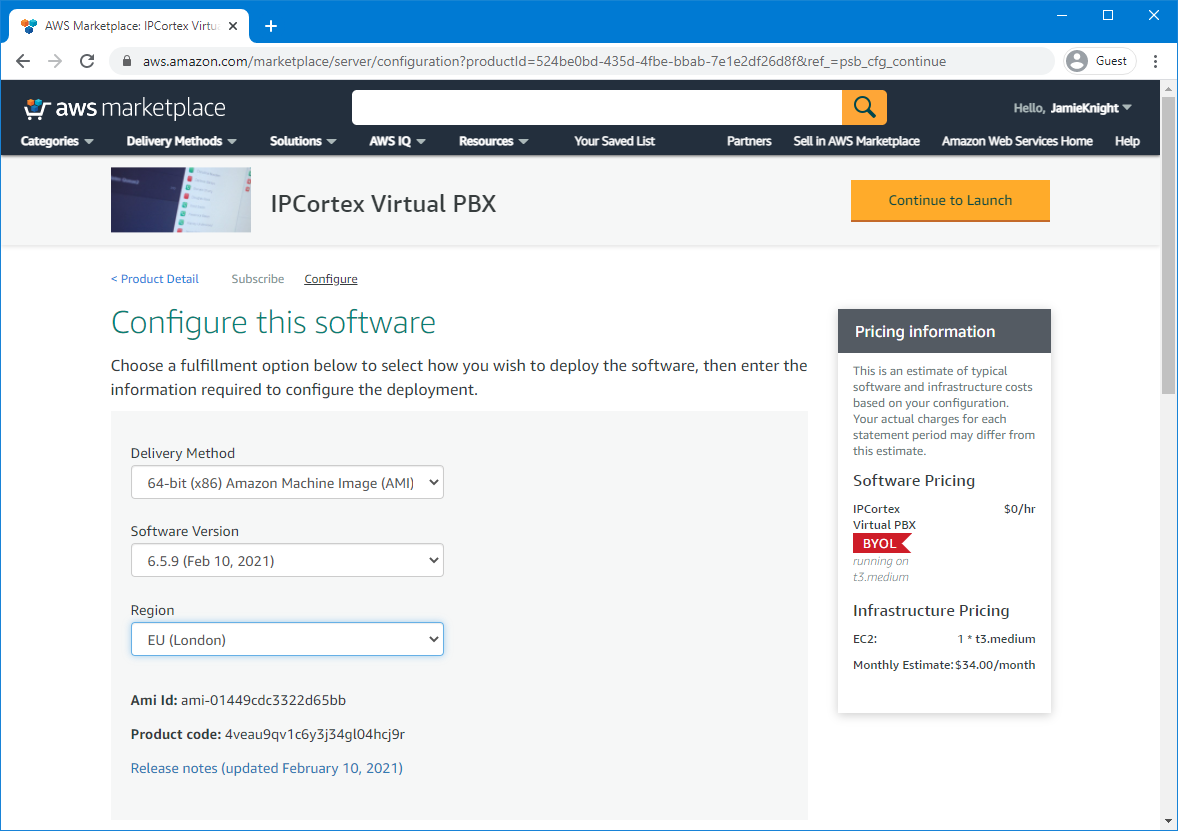
- Go to the subscription configuration page. (If you just completed the steps above, then you will be taken there automatically.) Make sure the latest software version available is selected, the correct region (e.g. eu-west-2 for London) is selected, then click Continue to Launch.
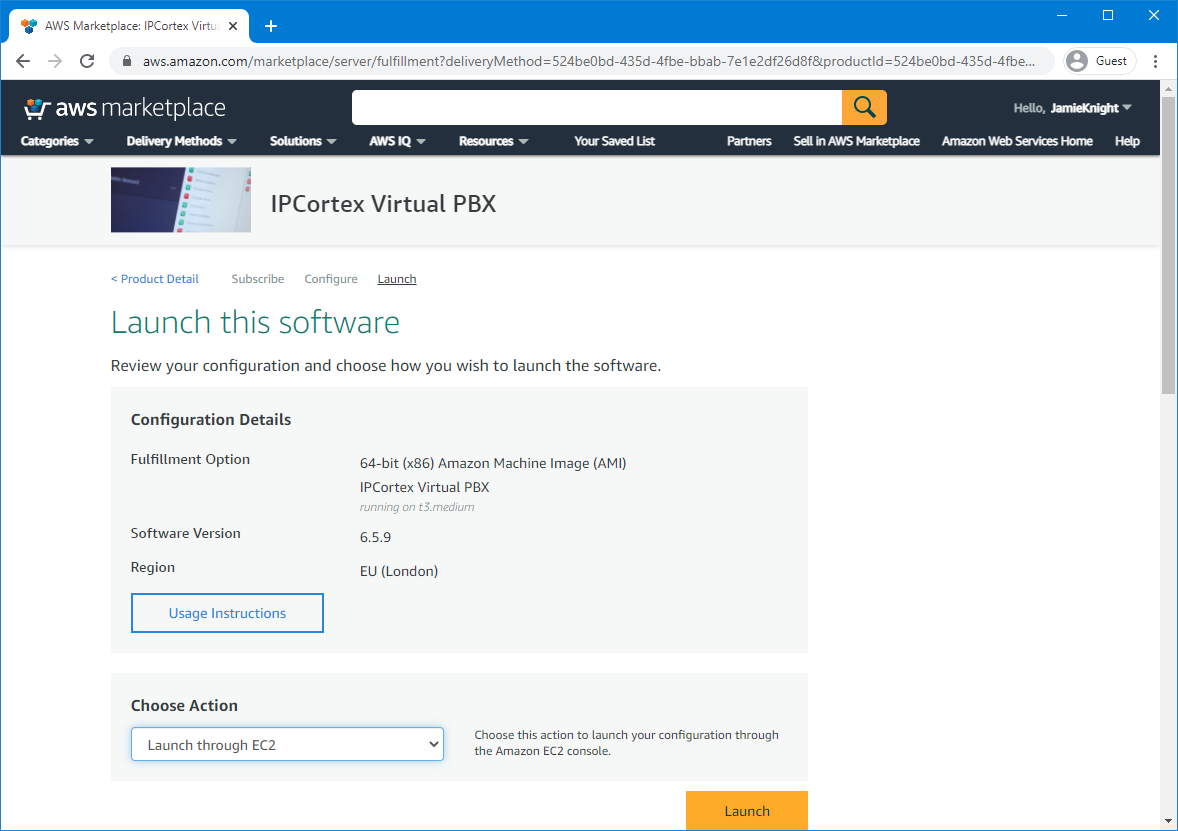
- On the Launch this software page, choose to Launch from EC2 and then click Launch. This will redirect you to the EC2 dashboard.
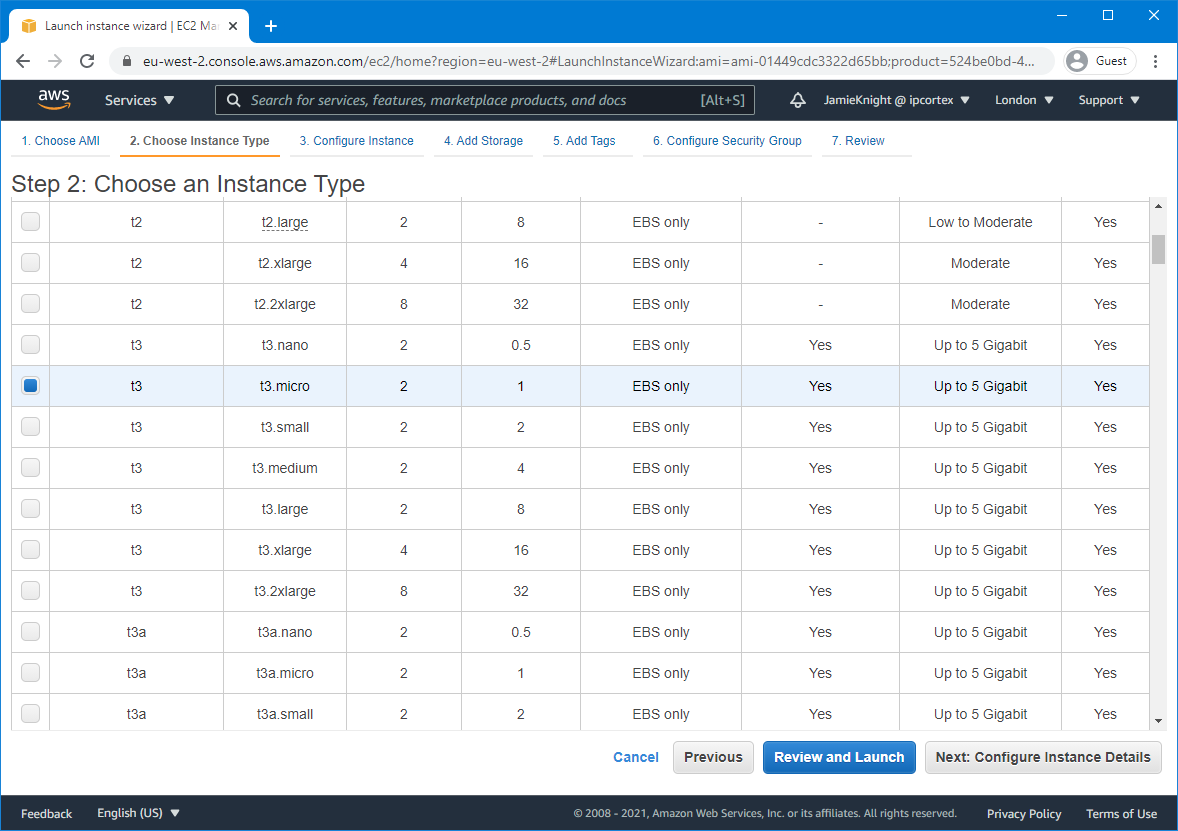
- Select the instance type for your PBX. t3.medium is the default, and t3.micro will work for very small or test instances. Click Next to continue.
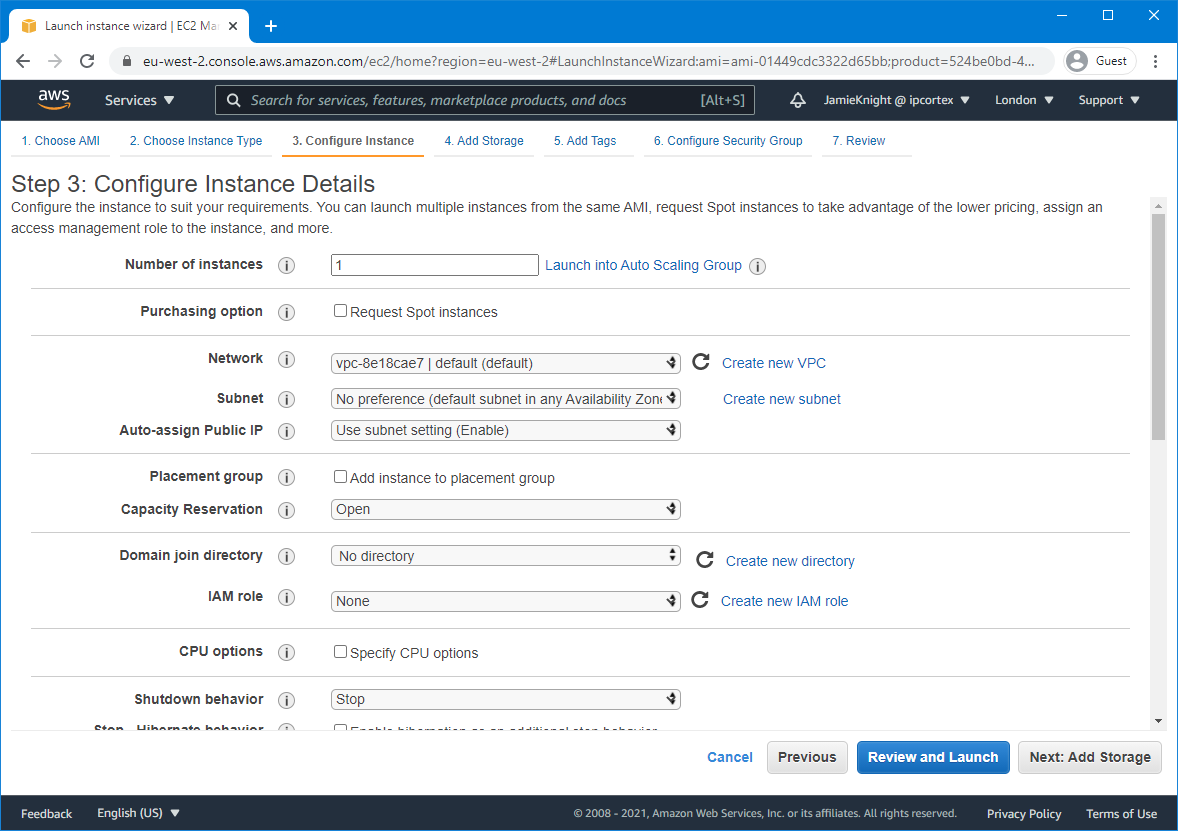
- Select the VPC and subnet to place the instance in. The default VPC for the region will be selected. Click Next: Add Storage to continue.
- You now need to decide how much disk space will be required and add the disks. The minimum size is 20GiB for
/dev/sdb(database partition) and 50GiB for/dev/sdc(voicemail/recordings partition). For the equivalence of a Pro,/dev/sdbwill need to be 20GiB and/dev/sdcwill need to be at least 400GB. These values can be increased if you expect to use more. Click Next to continue.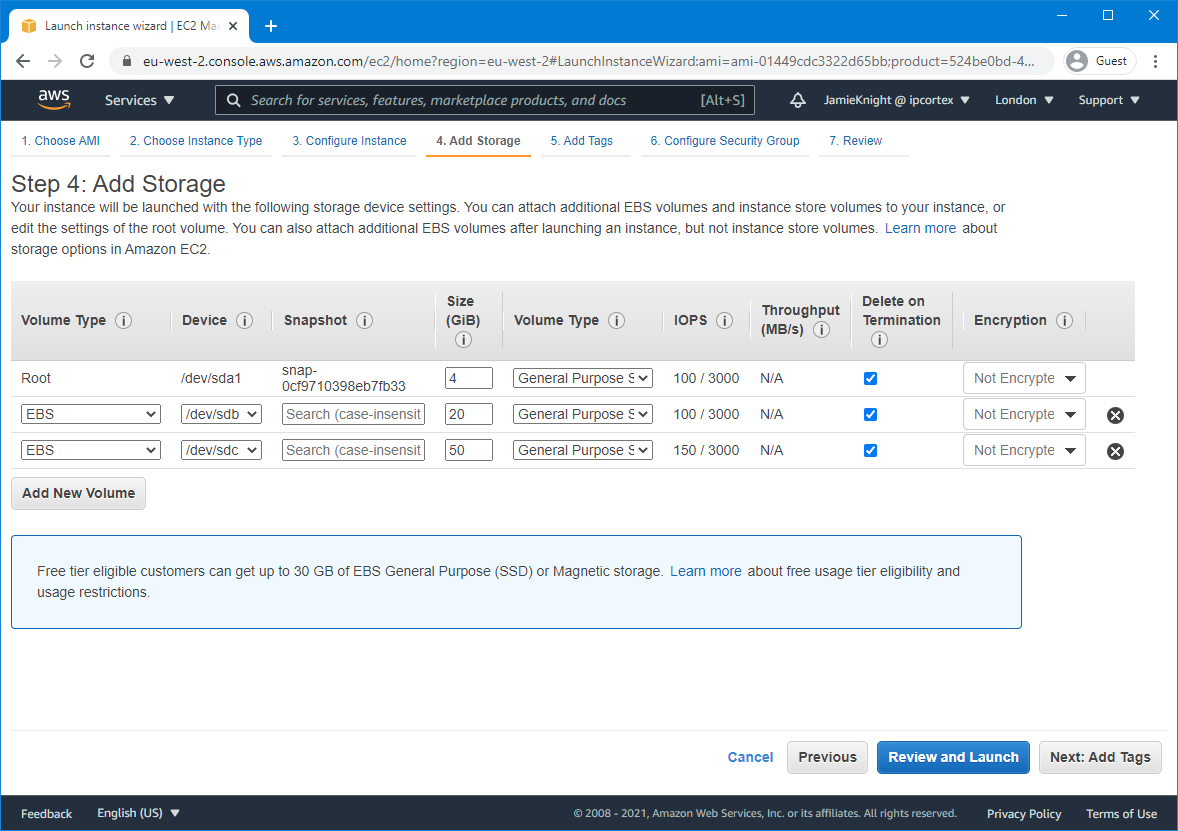
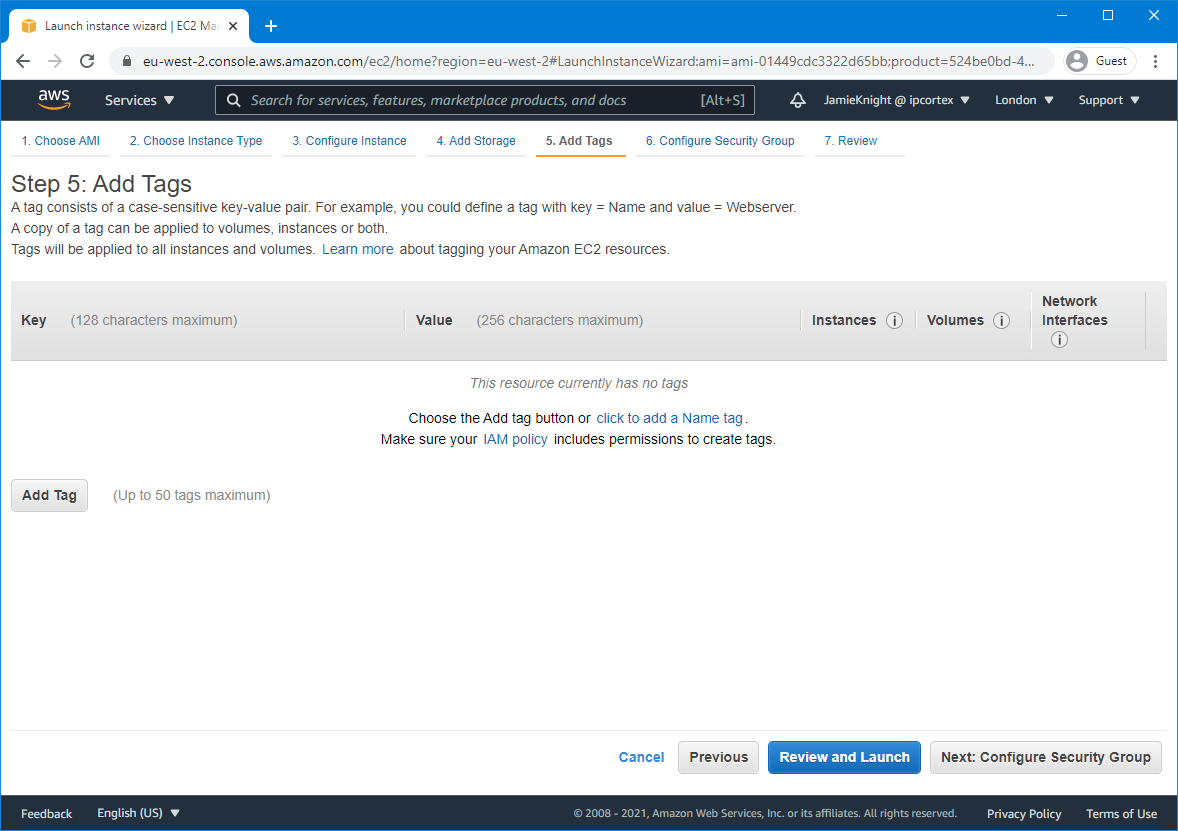
- (Optional) Add any tags you wish to the instance. These are arbitrary identifiers you can use to help you find group EC2 instances. Anything you add won’t affect the running of the PBX. Click Next to continue.
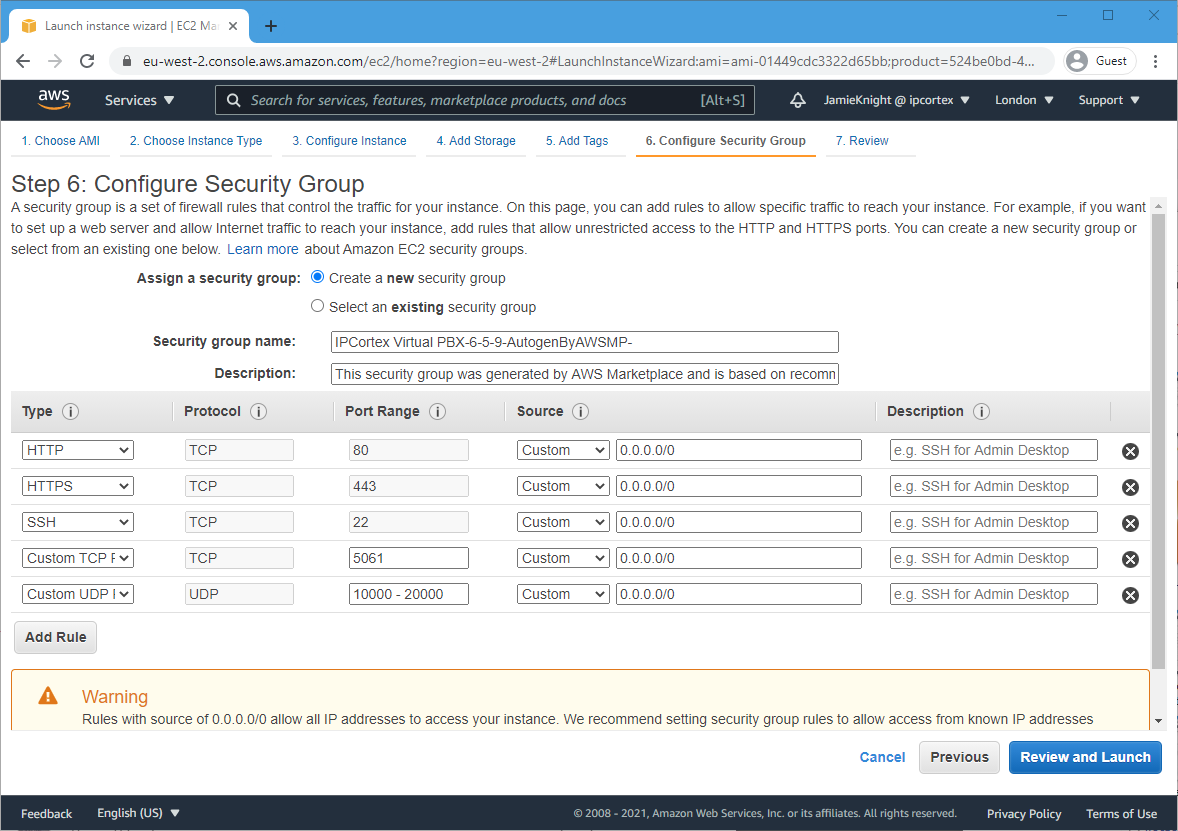
- Now you will need to create or assign a security group. This allows or denies traffic to the PBX, much like a firewall. Our suggested defaults will be filled in automatically, or you can use your own. We recommend you change the default rules to allow only trusted IPs in while you are setting up the unit. Once configured, click Review and Launch.
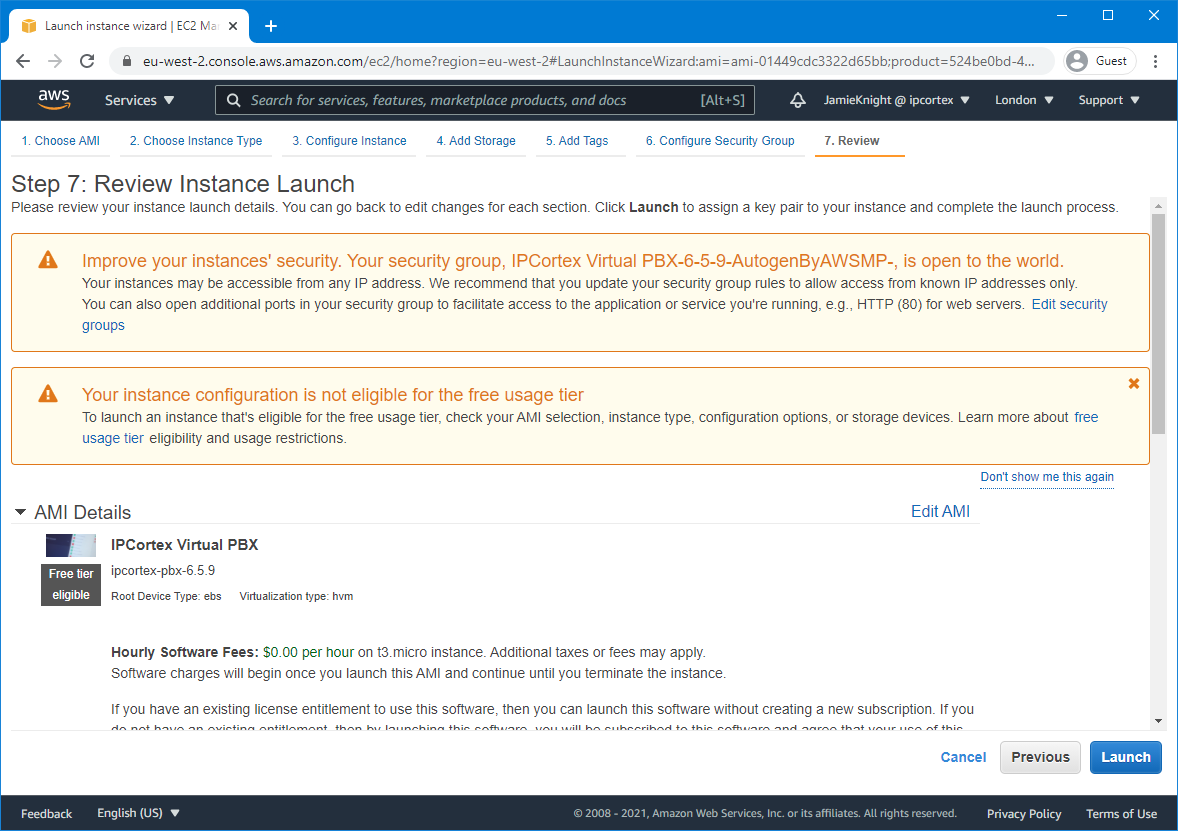
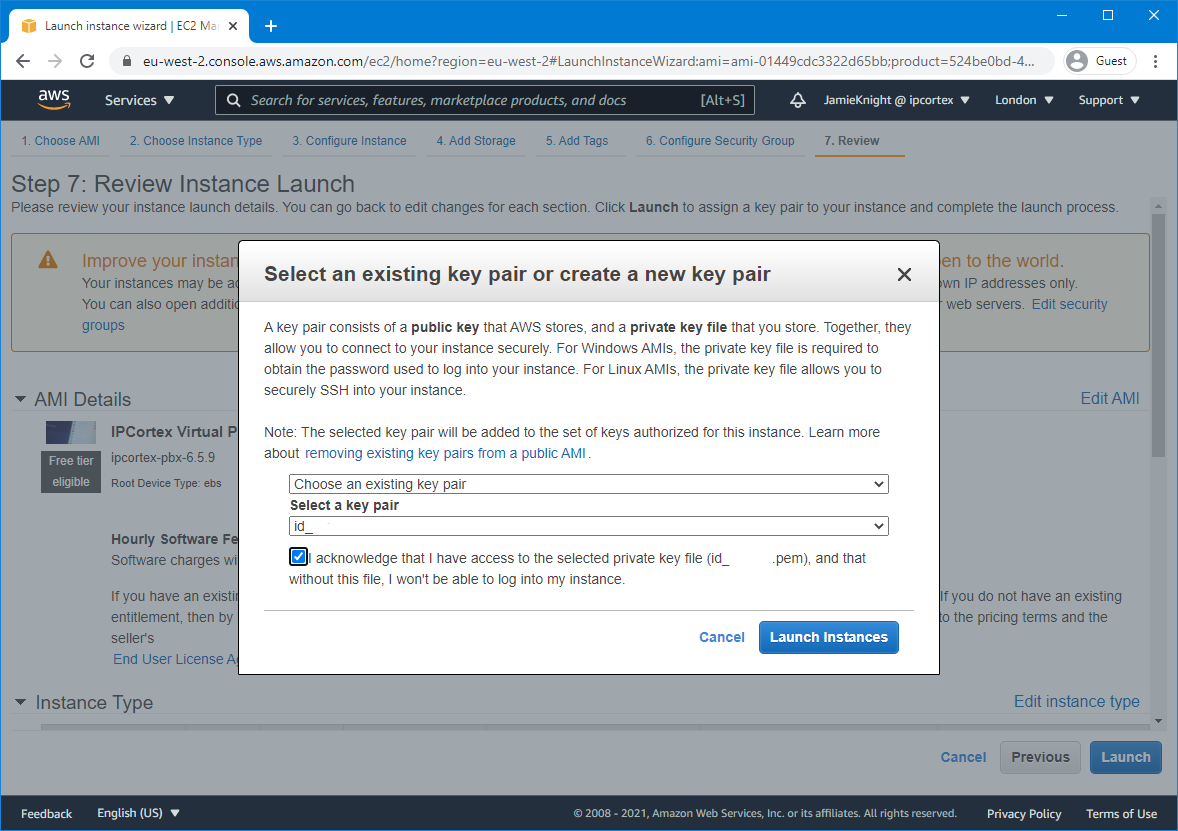
- You now have the option to review what will be created. Once you are happy with the settings, click Launch. You will then be prompted to either create a new or using an existing key pair. This is critical as this will be the only way to login to the unit using SSH, which you’ll need to do after launching.
- Your new instance will now launch. Wait while this happens.
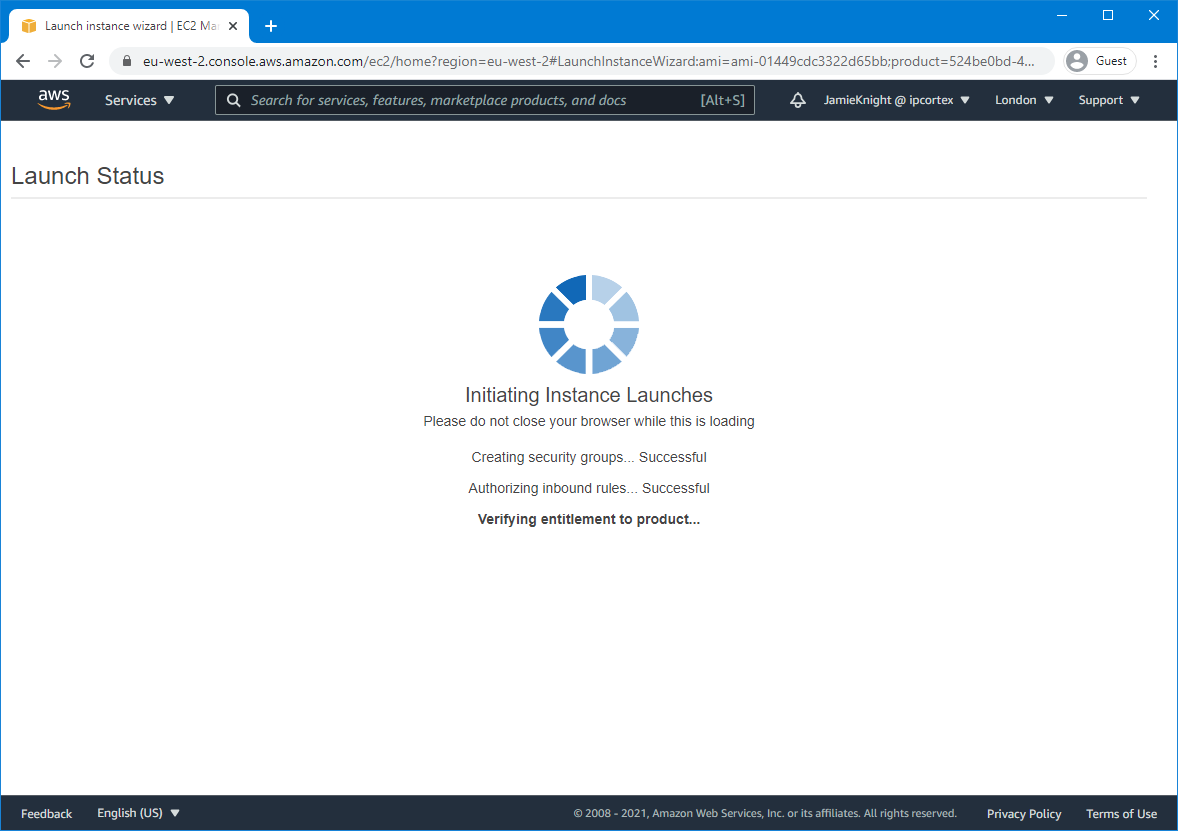
- Once complete you will receive a launch status screen. Click View instances at the bottom of the page.
- On the instance list, click you newly created instance and copy the public IPv4 address. You will need this to connect via SSH.
- Connect to the unit using your preferred SSH client (e.g. OpenSSH, PuTTY) using the public IP you copied and the key you previously created/specified. You will need to use the username
ipcortexto login.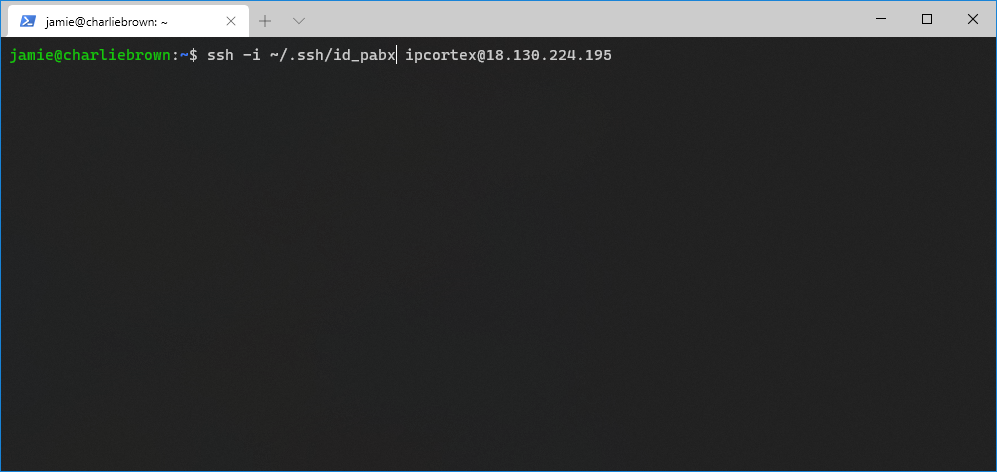
- Run
sudo -ito get a root prompt, thenmake_hdd_images.pl --doitto tell the system to use the extra disks. There will be lots of output, and will require the occasional confirmation by pressingy.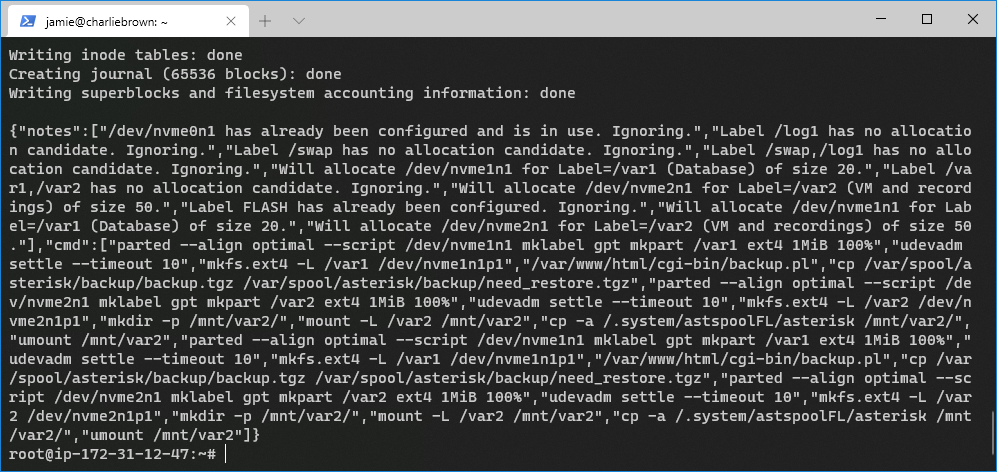
- Type
rebootat the prompt to reboot the instance. This will take a few minutes. - Once rebooted login again using the SSH key and IP you used in step 12. Run the command
df -h /.system/astspoolHD /.system/postgresHDto confirm that the new drives have been provisioned correctly. If the output does not show the filesystems as/dev/nvme...(e.g. they are/dev/loop...) then stop and contact support for assistance.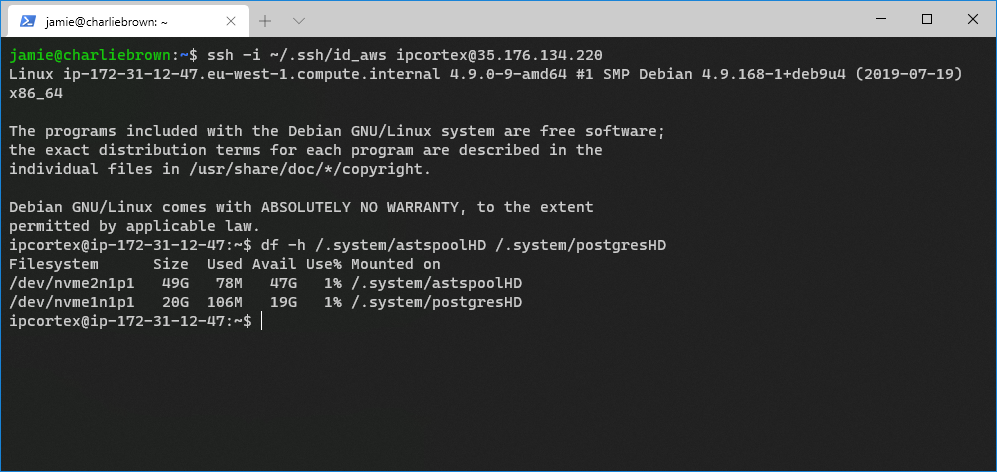
Configuration
You can now proceed to the configuration steps.