System Backup: Synology NAS
Estimated reading time: 2 minutes
Please be aware that Synology products are not IPCortex products and only act as a working example solution.
We have tested with the DS920+ (DSM 7.0-41890) but these notes would apply to other similar Synology units, and the same concepts apply to other NAS devices that support the rsync protocol (e.g. Netgear, Asustor).
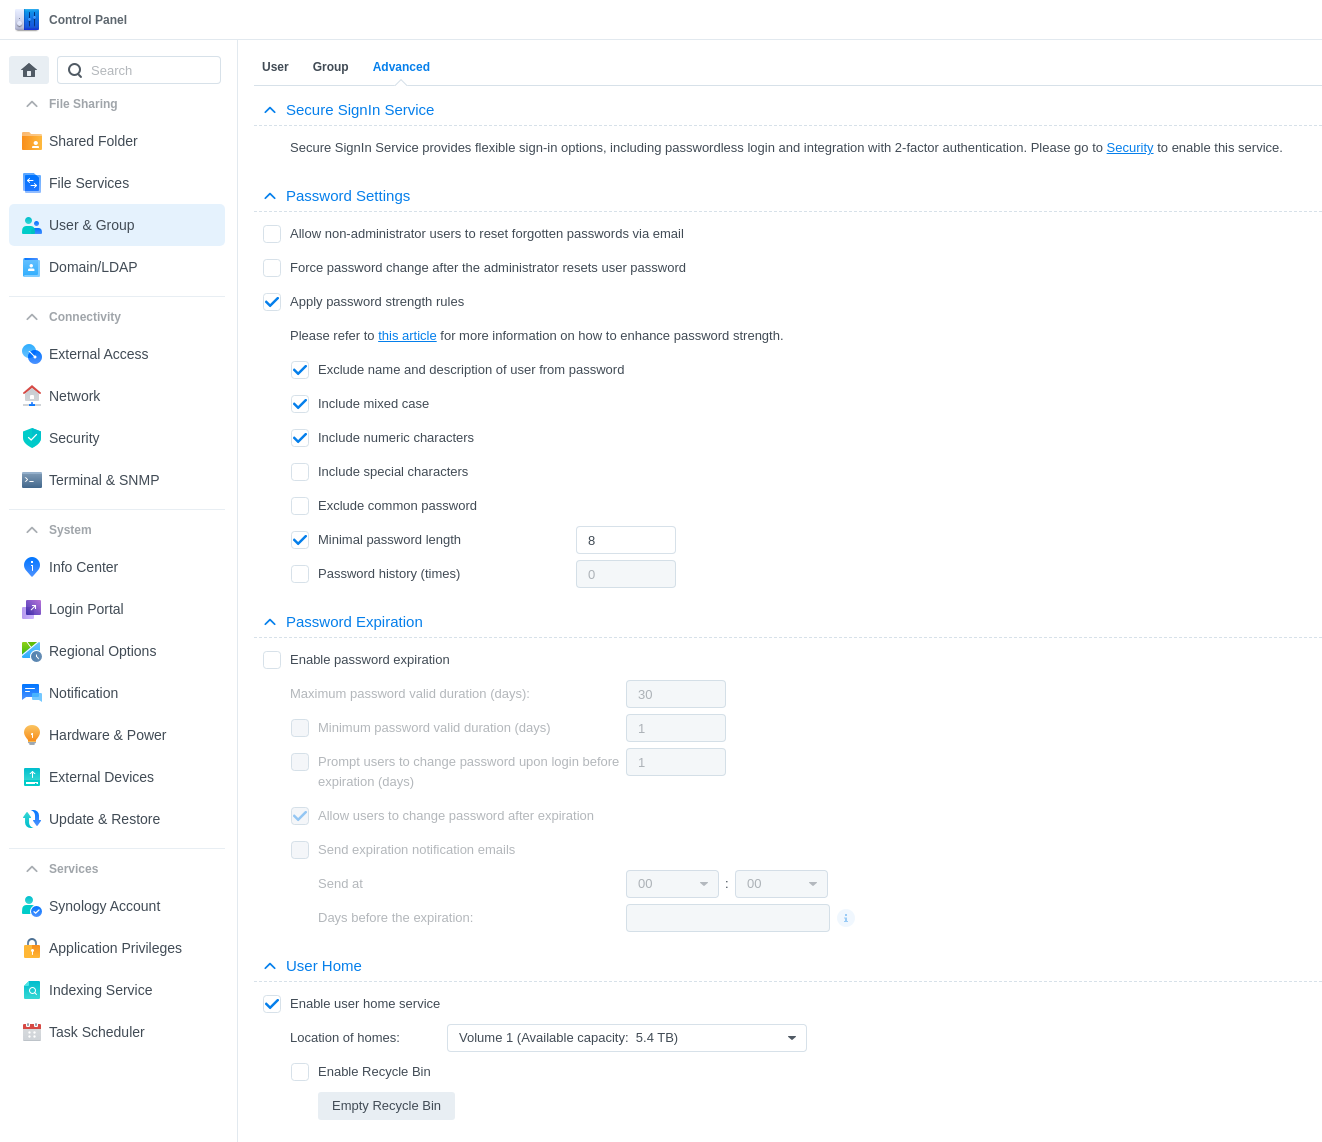
Enable user home service
This is where ssh-copy-id will try to store the authorized_keys file, so must be enabled.
‘Control Panel’ → ‘User & Group’ → ‘Advanced’ → ‘Enable user home service’
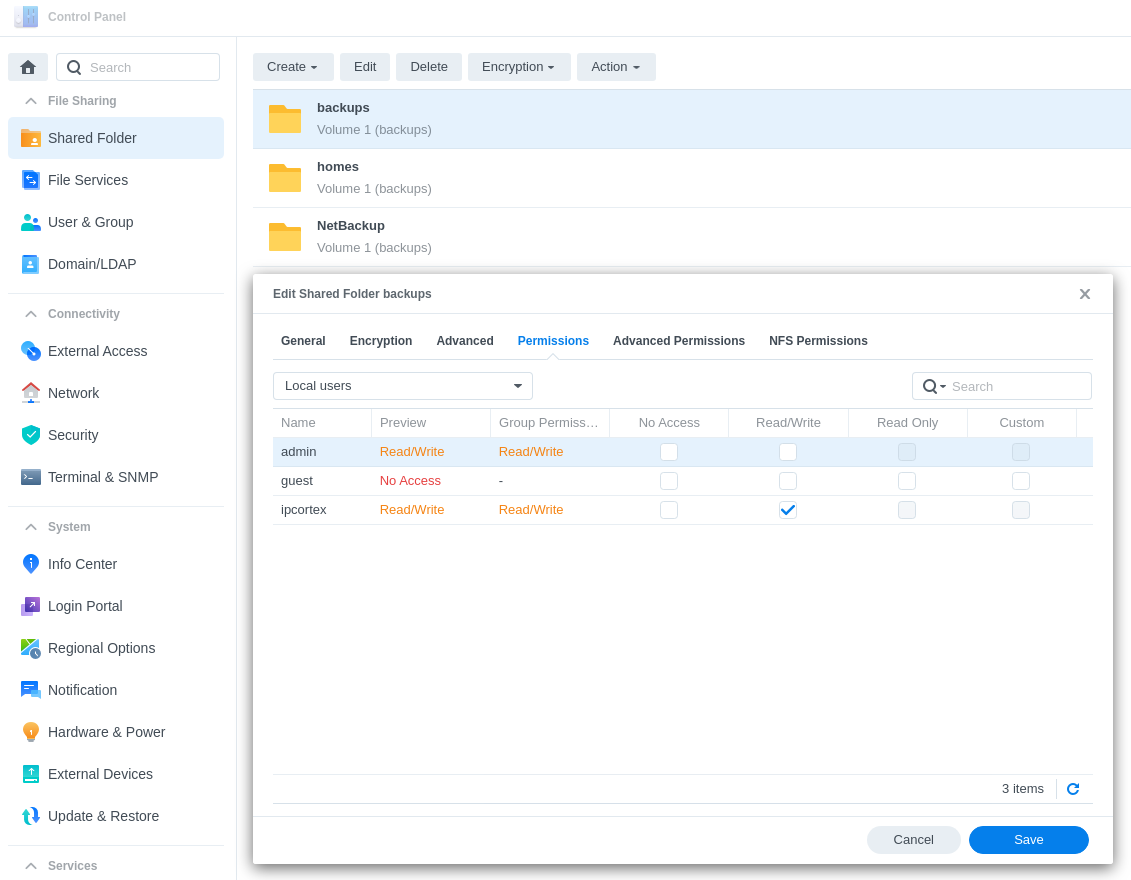
Ensure Read/Write permissions are granted
Check to ensure that the rsync user has read/write permissions for the desired path.
‘Control Panel’ → ‘Shared Folder’ → ‘backups’ →’Edit’ → ‘Permissions’ → ‘Read/Write’
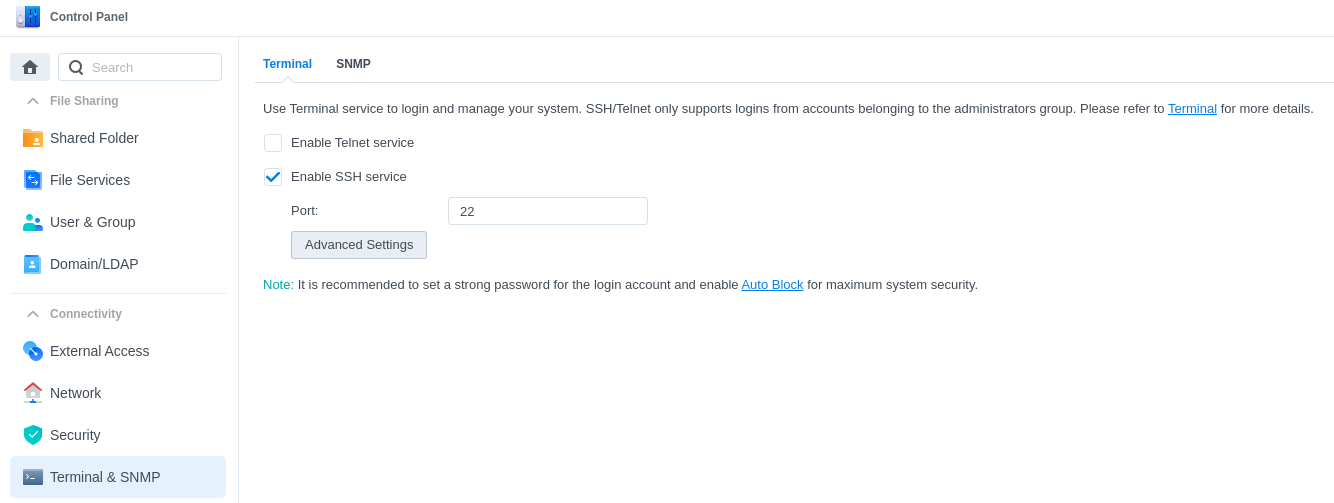
Enable SSH service
‘Control Panel’ → ‘Terminal & SNMP’ → ‘Terminal’ → ‘Enable SSH service’
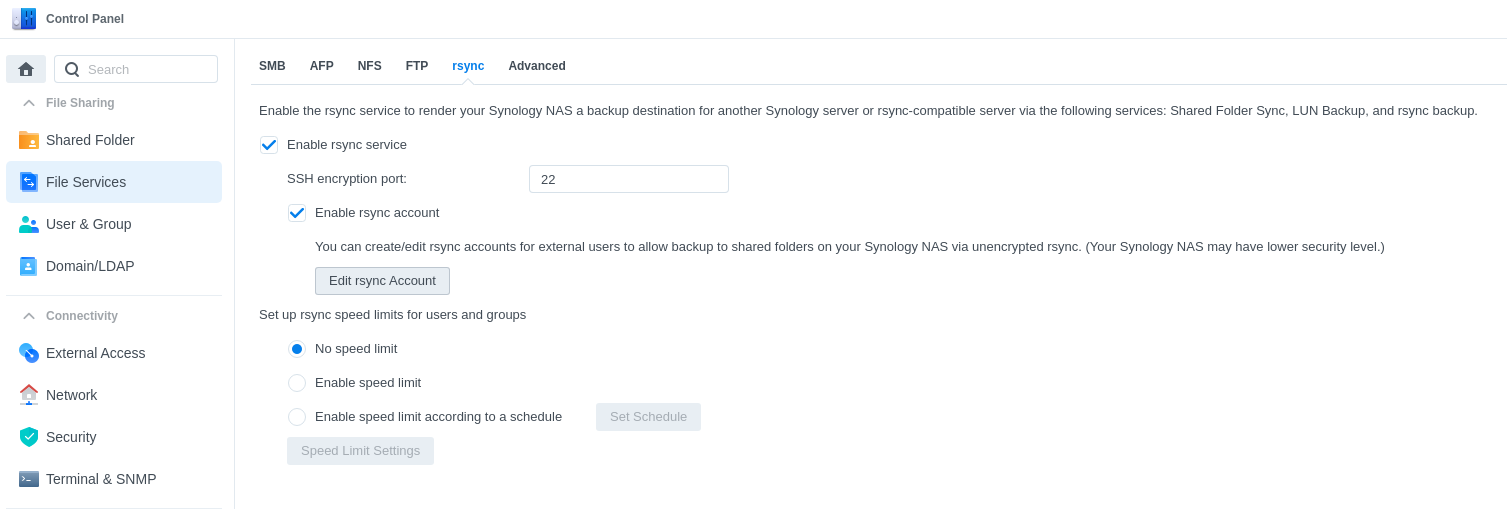
Enable rsync service & rsync account
Enable both settings below and select the account via ‘Edit rsync Account’.
‘Control Panel’ → ‘File Services’ → ‘rsync’ → ‘Enable rsync service’ → ‘Enable rsync account’ → ‘Edit rsync Account’
Copy key from CallStash using ssh-copy-id
With the above all setup, run the following from the CallStash terminal:
ssh-copy-id -i ~callstash/.ssh/id_rsa.pub username@ipaddress
This will create the ‘/.ssh/authorized_keys’ file for the rsync user.