Configuring Let's Encrypt
Estimated reading time: 3 minutes
Let’s Encrypt is a free, automated, and open certificate authority (CA), run for the public’s benefit, details of which can be found at the following site: https://letsencrypt.org.
Certificates are issued with a three month lifetime and software installed on CallStash will take care of automatically renewing that at the correct time. In broad terms CallStash will make a request to Let’s Encrypt for a certificate for the domain server name you want to use for your CallStash instance. Let’s Encrypt will then deliver the certificate by sending requests to port 80 (HTTP).
A prerequisite therefore is that requests received to port 80 on your public IP address must be correctly forwarded to CallStash. This may require firewall and/or firewall configuration.
Using Let’s Encrypt to generate a certificate for callstash.mydomian.com:
- Configure your DNS server to point ‘callstash.mydomain.com’ to CallStash device. Depending on your network configuration this may require DNS to point to your public IP address for your network with your router configured to forward traffic.
- Ensure that your network and firewall configurations will correctly route traffic to you CallStash appliance on port 80.
- Log into the console interface and run ‘callstash-config’ and select ‘Setup Certificate’.
The first two of these steps are entirely dependent on your network and firewall configurations and are outside of the scope of IPCortex and is not something for which IPCortex provide support.
Once your DNS and network are configured and you’ve run ‘callstash-config’ you will be presented with the top level menu. Select ‘Setup Certificate’ and, from the next screen, ‘Setup Let’s Encrypt’. This will take you to a sequence of pages stepping you through the fairly straightforward process:
- Confirm port 80 and DNS correctly configured.
- Agree to the Let’s Encrypt Terms of Service.
- Set an admin email for certificate notifications.
- Enter the domains for which you want a certificate. Generally this would be a single server name such as ‘callstash.mycompany.co.uk’. This will match the DNS record that you confirmed that you set up earlier.
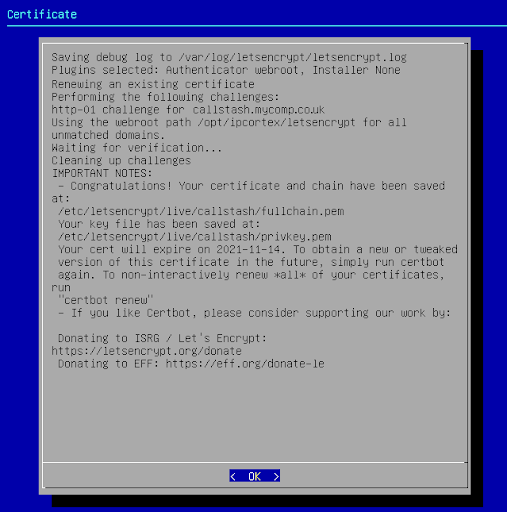
Once you’ve completed these steps Let’s Encrypt will be contacted to verify and issue your certificate which will be installed by CallStash. You’ll see a log of the results similar to that shown in the image below. Carefully check the output for errors.