Initial CallStash Configuration
Estimated reading time: 4 minutes
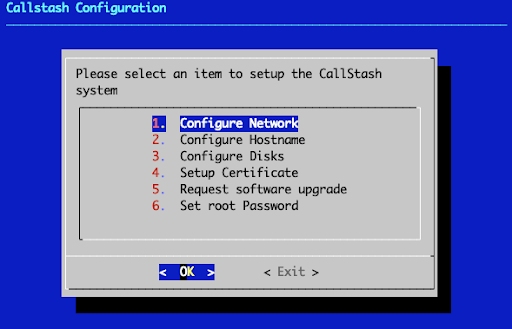
Once you have connected the console for the first time you’ll be presented with a system configuration tool. The utility is simple and contains the minimum number of steps to get CallStash ready such that you can access the system across the network.
You will be guided through a short set of pages each dealing with a separate element of the configuration:
- Selecting the network interface to use.
- Setting up the network parameters (DHCP or Manual).
- Setting the host name.
- Configuring disk storage.
Notes on using the configuration utility:
- Use the up and down arrows to select from a list or type the number against the selection you want.
- Press Tab to move between the fields.
- At any point press Ctrl-C to return to the start of the setup utility.
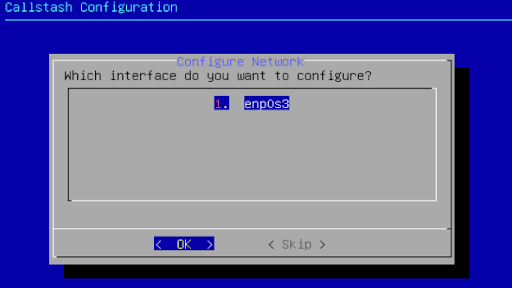
Network configuration
On the first page select the network interface to use for access to CallStash. If there is only one interface listed then you can simply press enter. The next page will give you the option of using DHCP or manually configuring the interface. The latter allows you to set the IP Address, net mask, gateway and a list of space separated DNS servers.
Configuring server ‘host name’
After configuring the network you’re offered the opportunity to set a device specific host name. By default the server’s internal host name will default to ‘callstash’. If you wish to change this then enter a valid name. The name may only comprise letters and numbers.
It is recommended that you leave the host name as ‘callstash’.
Setting a ‘root’ password
You will be asked to provide a super user (root) password for your CallStash instance. Remember to use the arrow keys to move between the two password fields!
Please carefully choose a secure password.
CallStash Disk configuration
For a physical CallStash appliance your product will have been pre-configured before shipping so you can skip this page by pressing ‘Enter’.
For a VM CallStash instance you should have configured and attached an unformatted raw drive to your VM to hold call recordings. At this stage you will be presented with a list of available drives for storage. You will be told if there are no available drives in which case you may need to check your VM configuration.
Note: if the attached disk has partitioned drives then it will not be presented as a candidate for CallStash. If the disk that you’ve attached is not recognised continue with configuration. At the end of setup check the virtual disk configuration and if necessary make changes and re-attach. The run the CallStash configuration tool.
If the drive you’ve attached to your VM is not shown as available then check:
- That the drive has not been partitioned.
- That the drive is at least 50GB in size.
Making changes after initial deployment
You may need to change some of the above settings after you’ve deployed your CallStash instance, for example:
- If the appliance is moved to a new network location.
- If your disk configuration was not recognised during configuration and you’ve made changes.
Connect to the CallStash unit via the console interface (keyboard/screen or via your hypervisor). Log in with the user name ‘root’ and the password is as set above.
From the command line run ‘callstash-config’. This will provide direct access to each of the steps above.