Configuring a 2N Helios IP door entry phone
Estimated reading time: 1 minute
- Manually add the phone to the PABX. The type does not strictly matter, but we suggest setting it as softphone/generic.
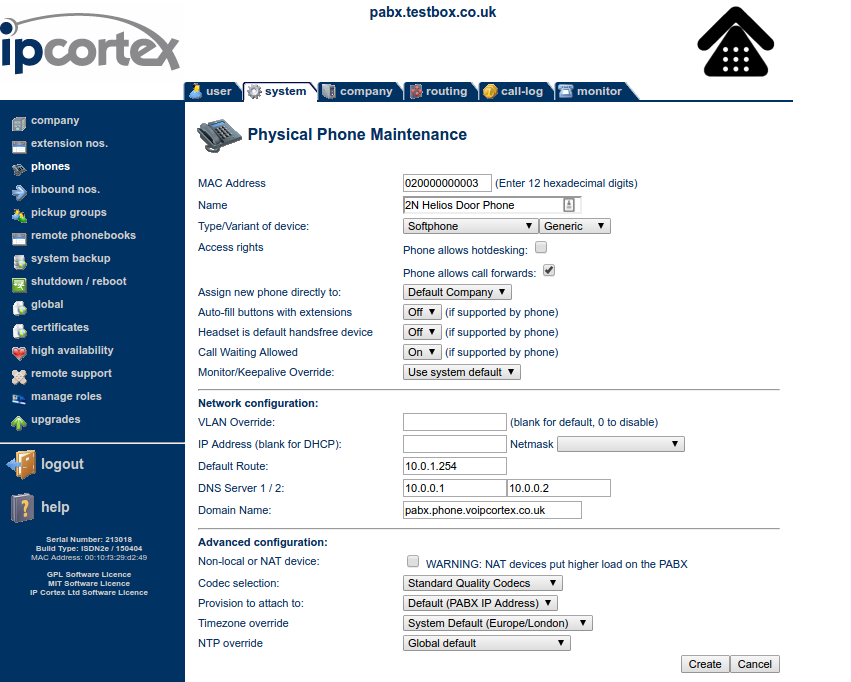
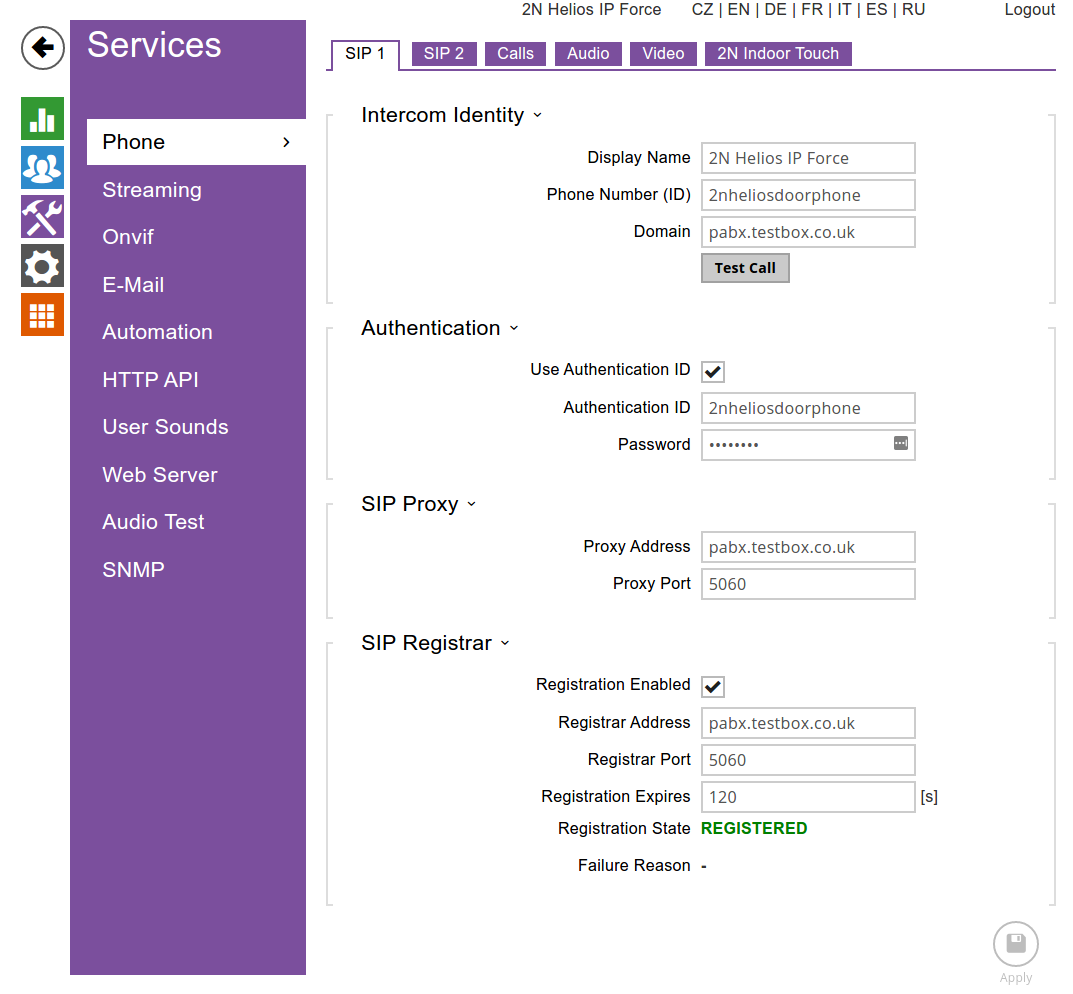
- After creating the phone, browse to the phone on the system to get the SIP username and password. Use that in the Services / Phone / SIP 1 menu on the device. Use the values in the screenshot below, replacing “pabx.testbox.co.uk” with the PABX’s hostname, “2nheliosdoorphone” with the SIP username, and the SIP password in the password field.
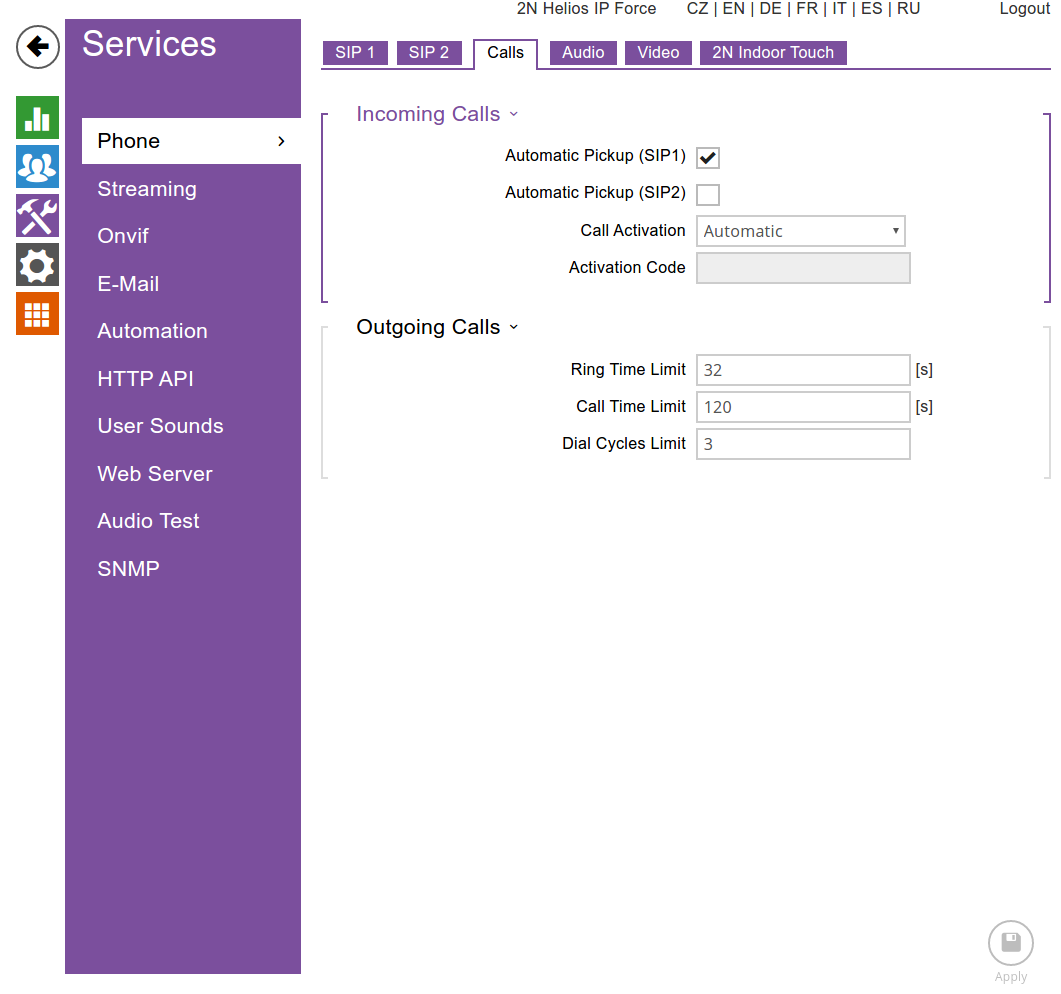
- Browse across to the Calls tab (still under Services / Phone) and configure it as shown below. (This allows the device to be called and act as if someone had pushed the button.)
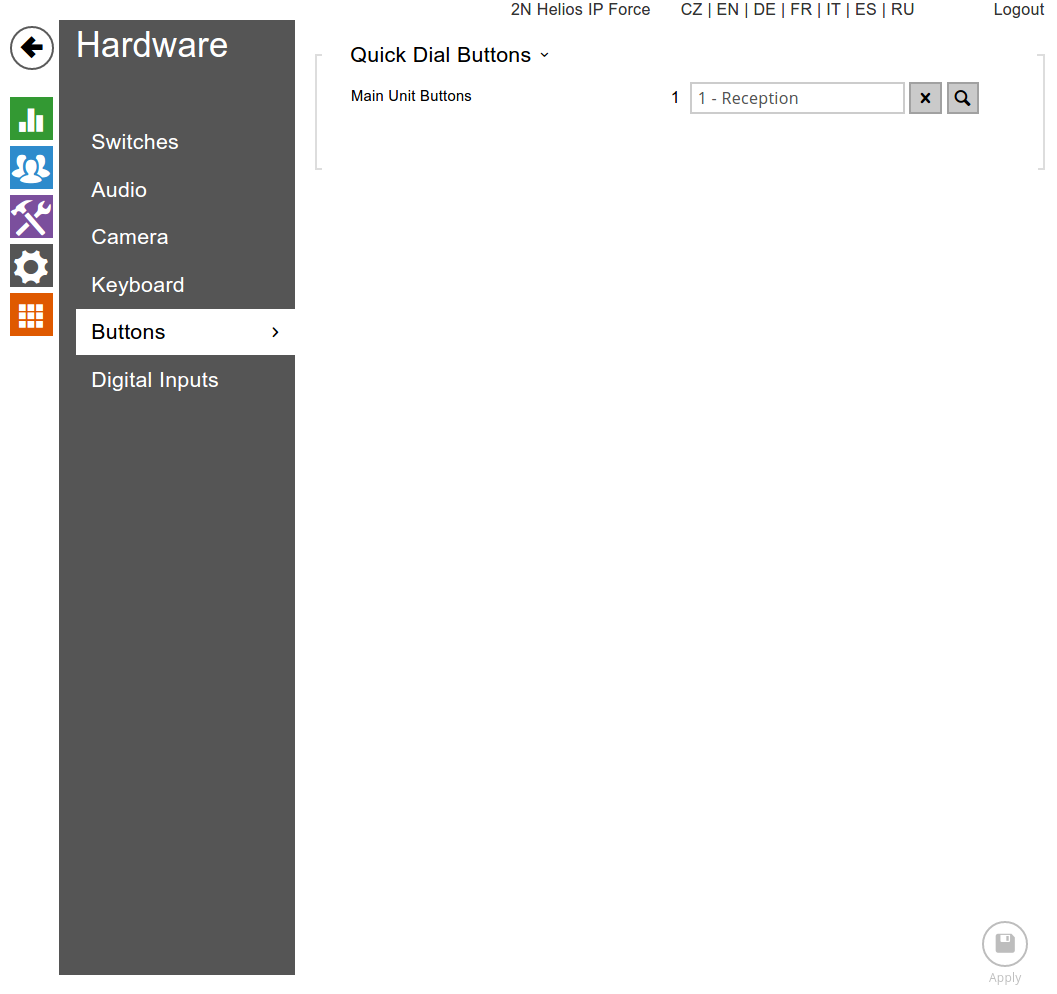
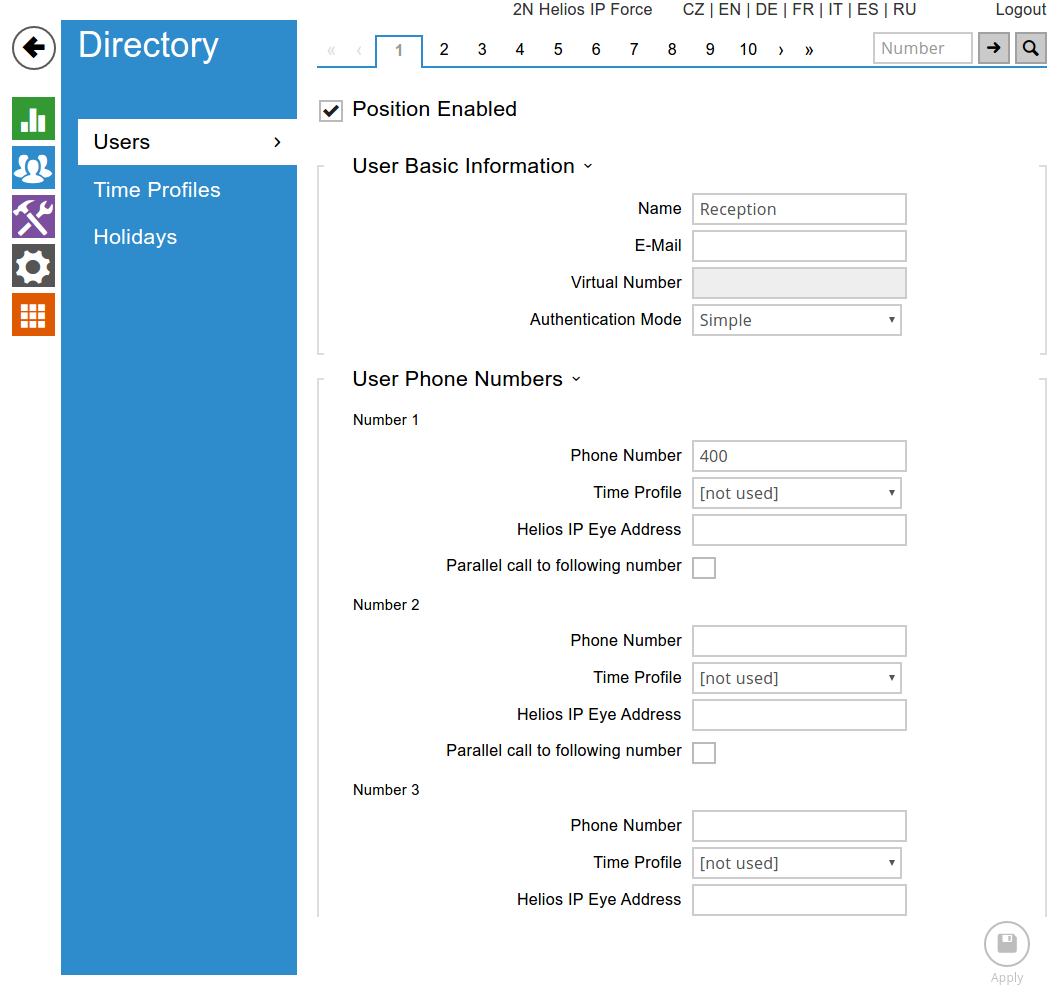
- Go Directory / Users / 1 and add the extension you wish to dial when the button is pressed.
- Enter the name of entry you created in the previous step into Hardware / Buttons. Note: this field doesn’t support a direct entry of an extension, and must use a directory entry.