Configuring a Sangoma Vega analogue gateway
Estimated reading time: 3 minutes
Notes
- Screenshots are from the Vega60G v2 8xFXS, but should apply to larger devices.
- Only FXS ports are considered in this document. FXO ports are not supported.
- The following instructions assume a Vega with factory settings.
- In a future version of the PBX (6.5.14+), it is possible to use the auto-config instructions.
Auto config (PBX version 6.5.14+)
- Browse to the PBX web interface and log in as an admin or ‘sys’ user.
- Edit the URL to be: http://pabx/admin/vega.whtm/xxxxxxxxxxxx where the ‘x’ characters are replaced by the MAC address of the vega device (The device must already have been added as per instructions in the long-hand setup below).
- Save the contents of that file to a text file. Note: use copy/paste of the web page to do this as File/Save in the browser does not always work.
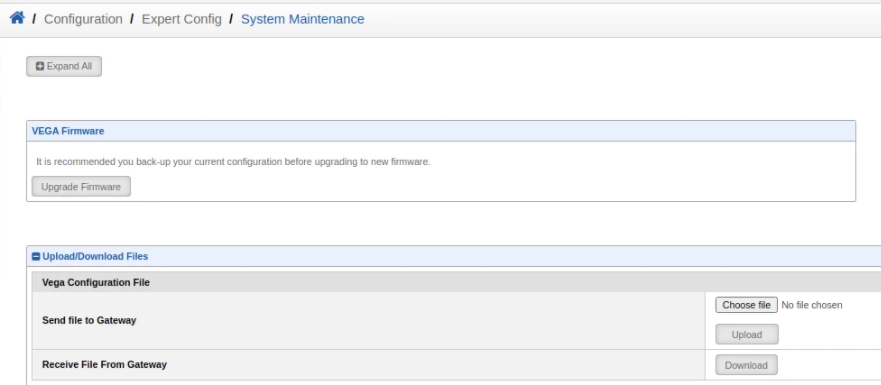
- Use the upload page of the vega to install the config:
Step-by-step guide
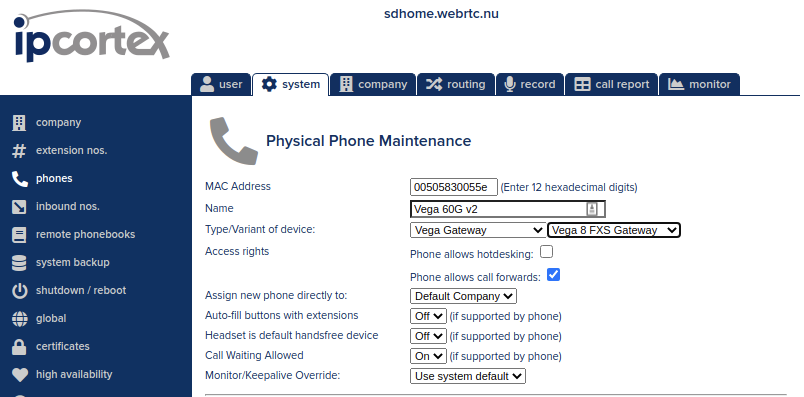
- Manually add the phone to the PABX. The type for the Vega gateway is available from PBX software version 6.5.11 and higher.
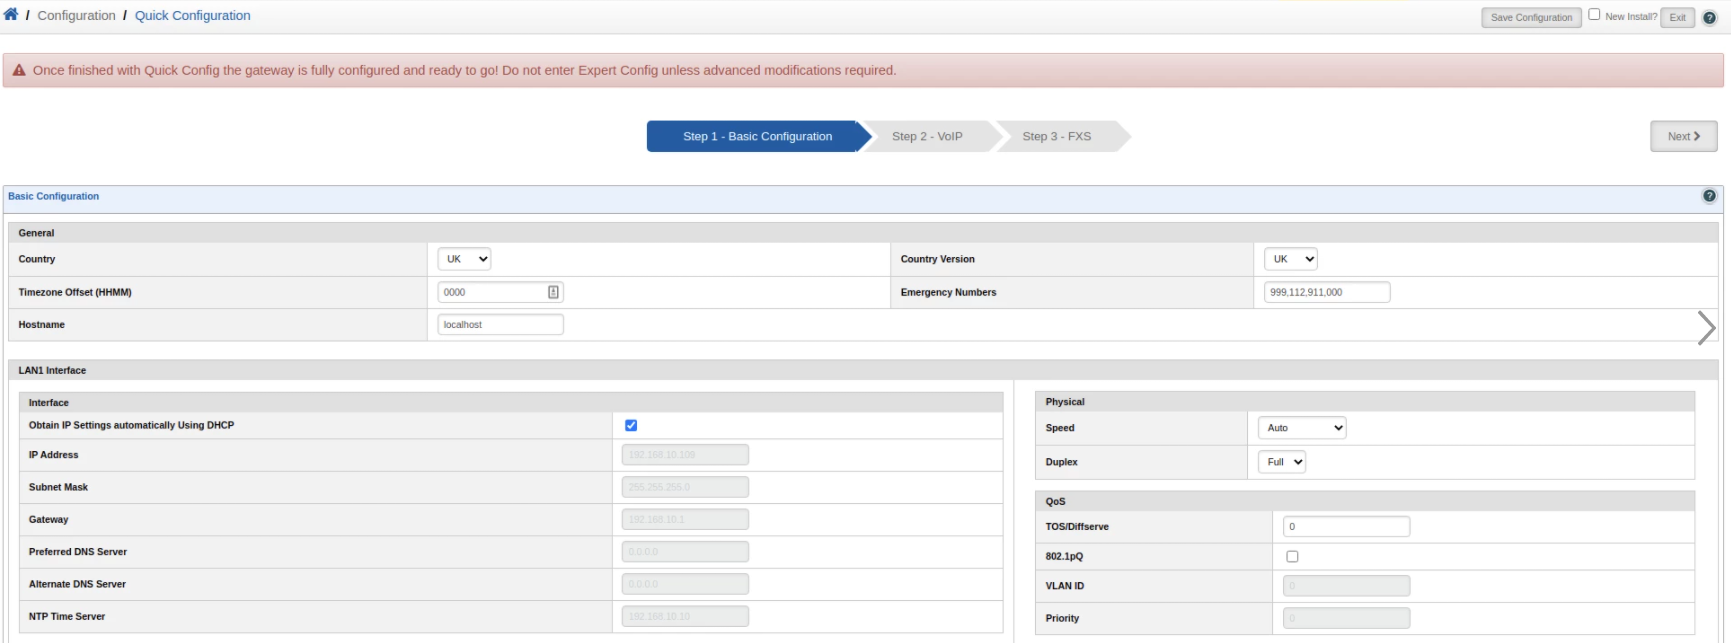
- After creating the phone, browse to the web interface on the Vega gateway. The default login is admin / admin. Select the “Quick Config” option, and select UK options as filled below:
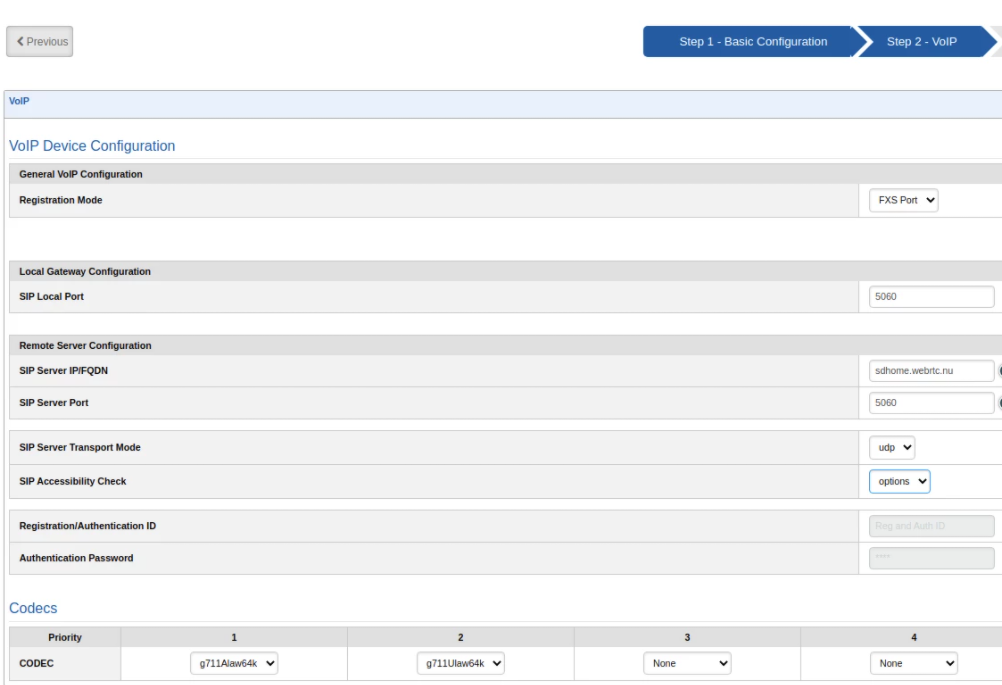
- Click next and fill the PBX details, and change the code selections at the bottom of the page -= Ot is important to select “FXS Port” as the registration mode:
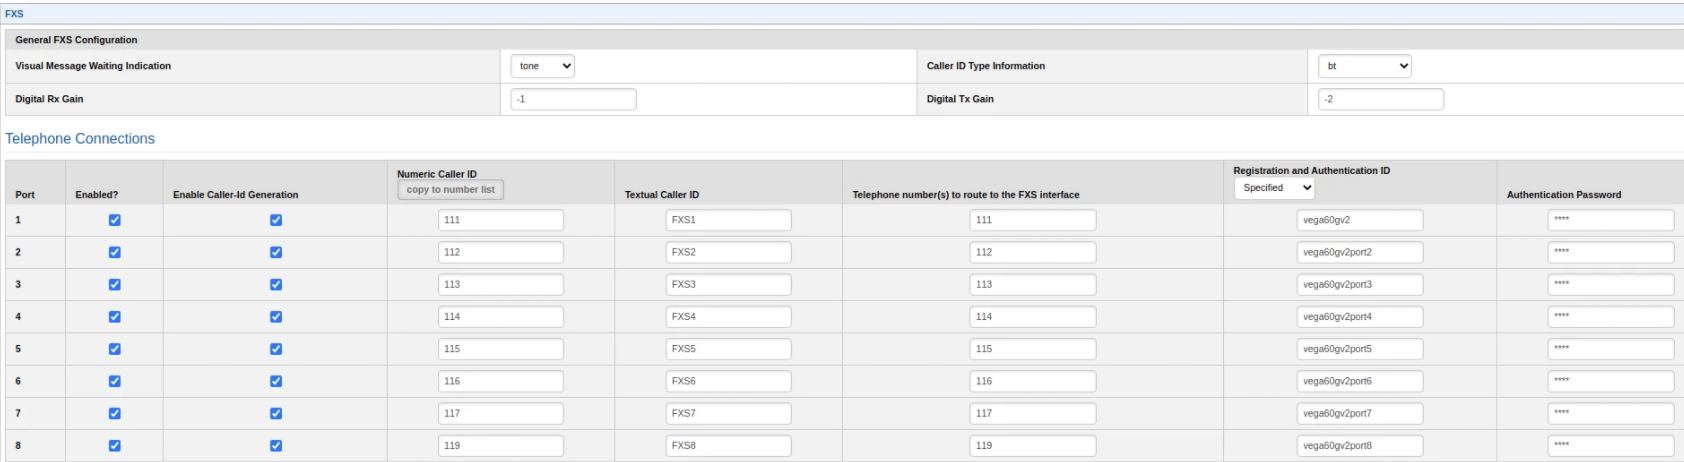
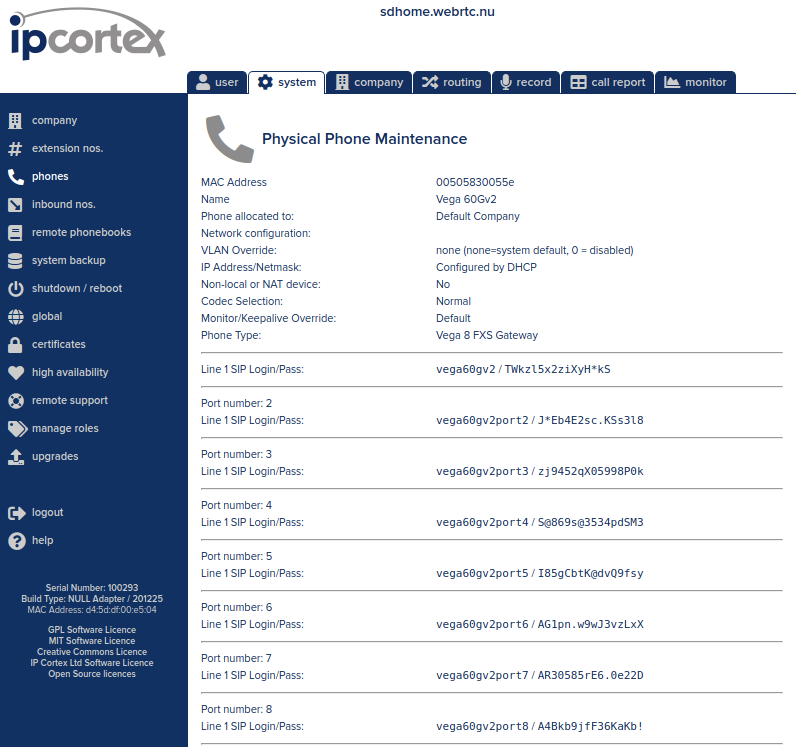
- Click next and fill in authentication details for each port in the rightmost 2 columns - This information can be found on the PBX System/Phones page by clicking the spyglass icon next to the Vega device. Tick ‘New install’ and click save.
Vega screen:
 PABX screen:
- At this point, all ports that had a username and password provided should register with the PBX. This can be checked on the Monitor/Panel screen.
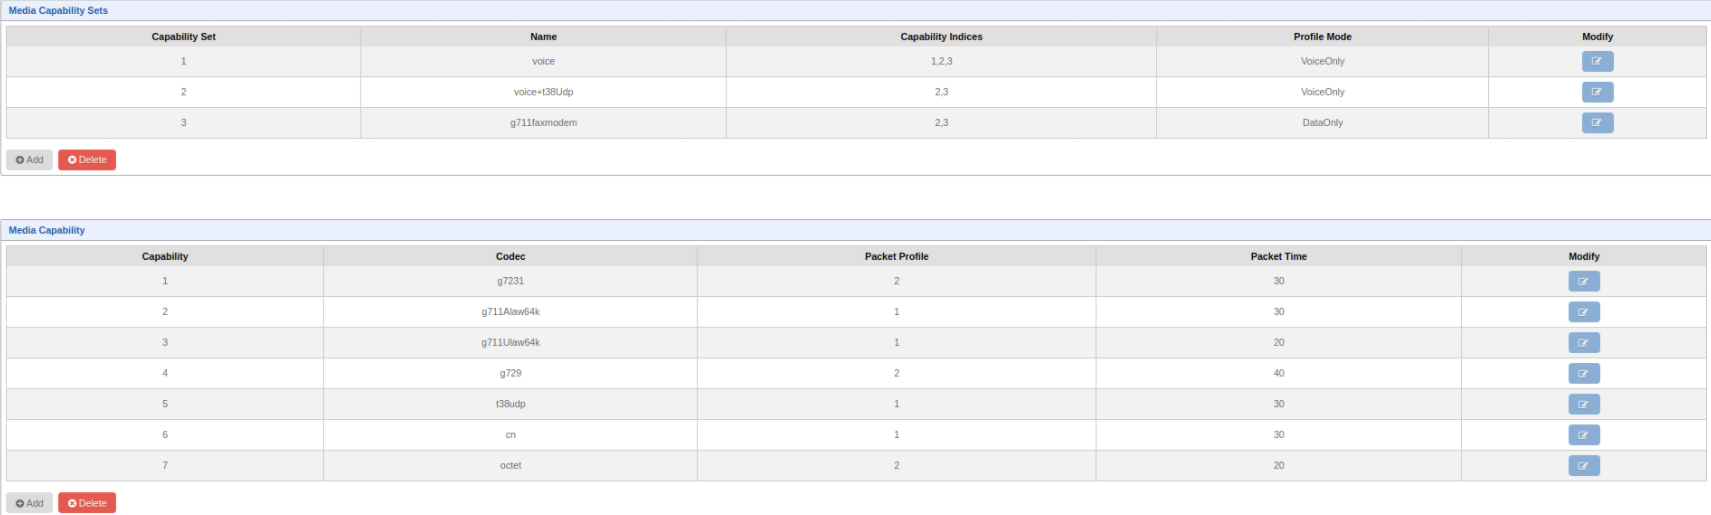
- It is necessary to edit the aLaw profile to use a packet time of 20ms, rather than the Vega default of 30ms. This is done on the Expert/Media page. NB: The uLaw value should be 20ms already, but should be corrected if not.
- Select to “Apply” if offered. Select to “Save” if offered. Select to “Reboot” if offered.
- The next step can be time consuming. Manually, set the SIP Registration DN to match the number set in the quick-setup as follows:
